What Can You Actually Do With Midjourney’s AI Video Tool?

You jump onto a competitor’s homepage to see what they’re up to, and there it is: a short, looping video that makes their cupcakes (or lawn mower blades, or custom Labubus, or whatever they sell) sparkle like they’re in a Hollywood trailer produced by Spielberg himself.
Meanwhile, on your own site?
A lone, still JPEG.
via GIPHY
Unfortunately, that matters more than just the immediate sizzle reel envy it gives you. In Wyzowl’s 2024 State of Video Marketing survey, 82% of people say that they’ve been convinced to buy a product or service after watching a video.
If motion grabs wallets that reliably, leaving your pages static is basically an open invitation for shoppers to go elsewhere.
The catch, of course, is that most small businesses don’t have a camera crew (or budget) to produce a slick video for every product or service they offer.
Enter Midjourney.
Earlier this summer, the AI tool introduced its new V1 Video model. With prompts, images, or videos you capture on a smartphone, you can now create super polished clips you can loop, extend, and post in minutes.
In this walkthrough, we’re exploring Midjourney’s video capabilities to help you see what the tool can really do for business owners:
- What’s marketing hype and what’s real
- Actual examples you can take inspiration from
- Workflows for business owners who are new to AI
- How to know when to use AI and when to actually shell out for a videographer
Ready to find out if Midjourney’s V1 Video model can give your site its own sizzle reel? Let’s dive in.
Midjourney Video 101
Midjourney’s V1 Video model went live on June 18, 2025, giving every subscriber a brand new “Animate” button in the web app (Discord commands still don’t work for video). Drop in any still image and the model spits out five-second, 480p MP4 clips you can loop, extend, or upscale.
What makes it different from other AI video toys you’ve heard about? Here’s what small business owners need to know:
- It offers an image-to-video workflow: Start with any Midjourney image (or an uploaded photo) and click “Animate.” The model generates four five-second videos. That means there’s no need to learn text-to-video prompting from scratch. You simply build on images you already like.
- There are two motion styles: “Auto” writes a motion prompt for you. “Manual” lets you describe the movement. You can also choose “high” or “low” motion. Auto is great for first timers. Manual gives you more control when you want just a gentle product spin.
- It’s web-only (for now): Video generation lives in the Midjourney web app — Discord commands don’t work yet. This keeps your workflow in one browser tab, which can be handy if Discord feels cluttered.
- Videos generate at 480p resolution out of the gate: Clips export at 854 × 480px, extendable to 21 seconds in four-second increments. This is perfect for social feeds and email banners, but you’ll want an upscaler for 1080p hero videos.
- Videos are more expensive than images: Each video job costs roughly 8x what an image costs to generate. On the $10 Basic plan (which gets you 200 Fast minutes), that equals ~25 short clips per month. Pro and Mega plans unlock unlimited Relax mode, which works slower but doesn’t use up your GPU pricing.
Midjourney Video Expectations vs. Reality
When they announced V1 Video, Midjourney said the model was 25 times more affordable than any comparable tool on the market. That’s technically true —but there are trade-offs every small business owner should weigh.
We used Midjourney V1 Video to create this 5-second clip.* It’s crisp enough for Instagram or email headers, but we’d recommend upscaling it for full-width site banners.
*And as a slight drawback, the “foam” starts out the same color as coffee. So, something like this takes some finessing in the prompts.
Midjourney Examples for Small Businesses
Looking for some inspiration? Here are three ways small businesses can use Midjourney.
- Image: High-res frontal product shot.
- Prompt starter: Slow 360-degree spin, neutral background, even lighting, loop seamlessly.
Pro tip: Keep the background plain so the motion mask doesn’t warp the product’s edges.
- Image: Vertical (9:16) lifestyle shot featuring your product in context (for example, a coffee cup in hand or shoes on feet). Bright background colors can be extra eye-catching.
- Prompt starter: Vibrant camera push-in, confetti burst, upbeat energy.
Pro tip: Crop the image to vertical before uploading. Midjourney holds that aspect ratio, so you won’t lose critical framing when you export for Reels.
- Image: Wide, landscape photo that already feels on-brand. Keep the focal point centered with negative space on the sides.
- Prompt starter: Gentle slow-motion breeze effect, subtle movement only in background, loop seamlessly.
Pro tip: After exporting, compress the loop under 5 MB to keep your page speed high.
Your Midjourney Roadmap: How To Start Animating Images in 10 Steps
Here’s exactly what to click, tweak, and upload to create your first AI video using this tool.
Step 1: Choose the Right Plan for Your Business
Midjourney offers four plans.
With all plans, you can purchase extra GPU time for $4 per hour, and earn extra Fast time by rating images.
Step 2: Start With a Clean, Well-Lit Still Image
A sharp, clutter-free photo makes the AI’s motion mask most likely to behave. Shoot against a plain background or remove clutter in any basic editor before uploading.
You can also animate an image you generate using Midjourney.
Step 3: Log In and Hit “Create”
Go to Midjourney.com to generate an image. Create a prompt and click the paperplane button or upload your own.
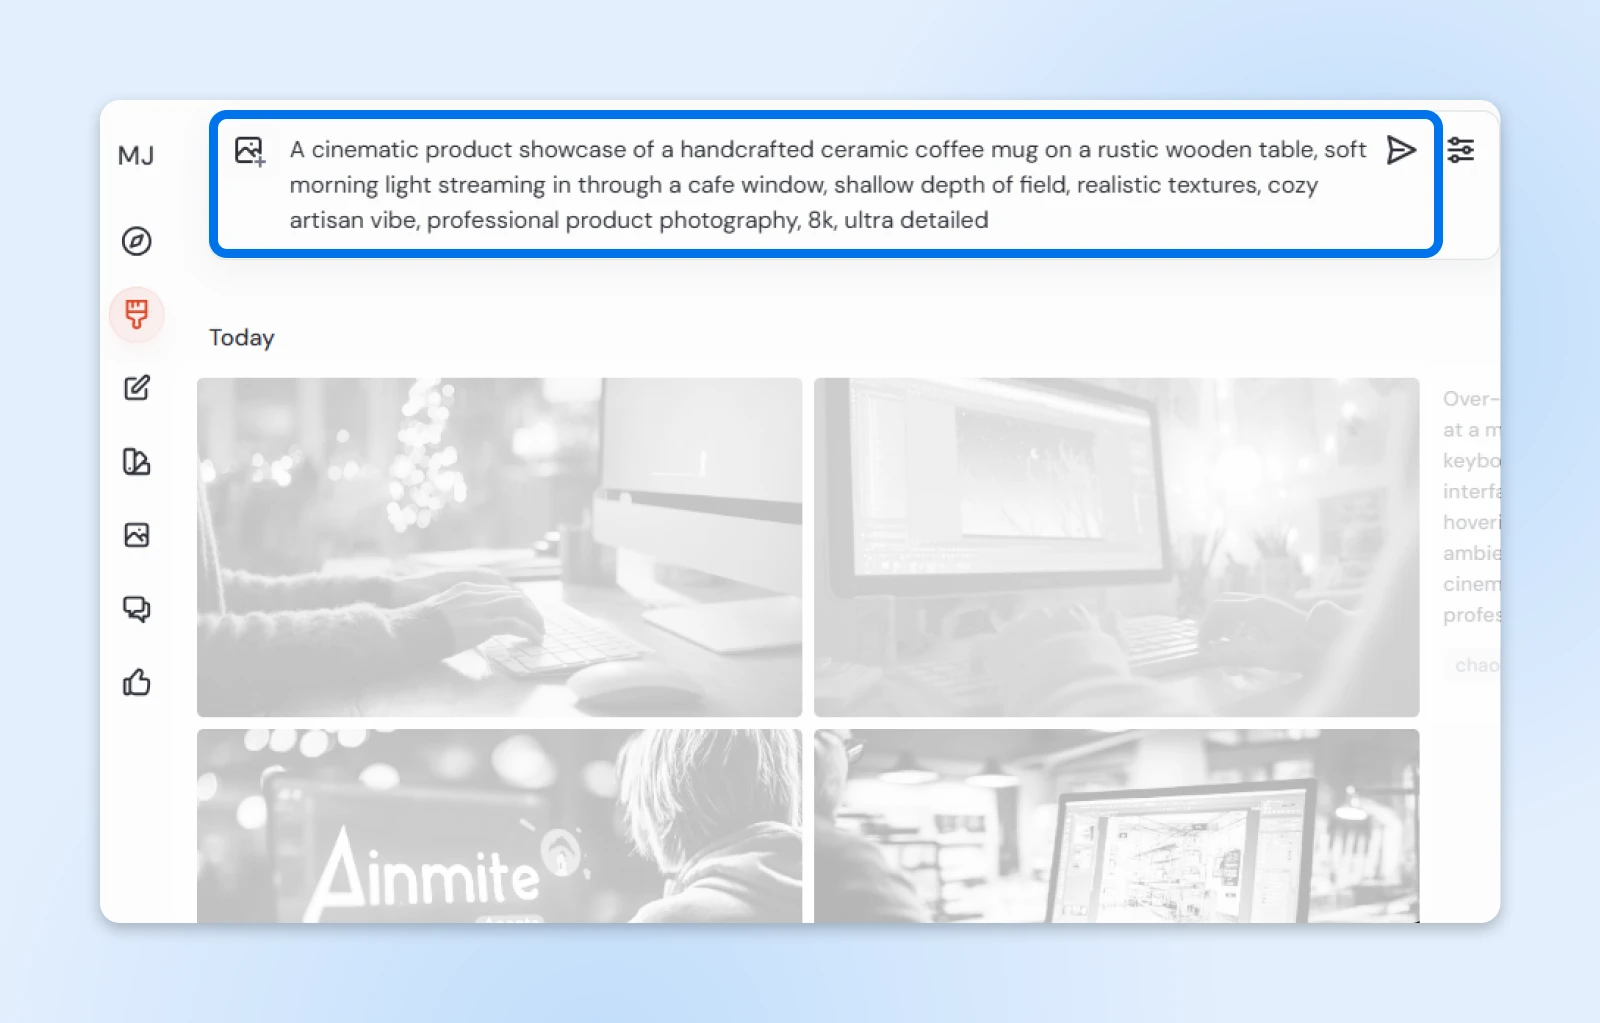
Once the image options have been generated (there should be a few options), click on the one you like best. Or, you can scroll through the thumbnails to the right if you have already been working on other projects.
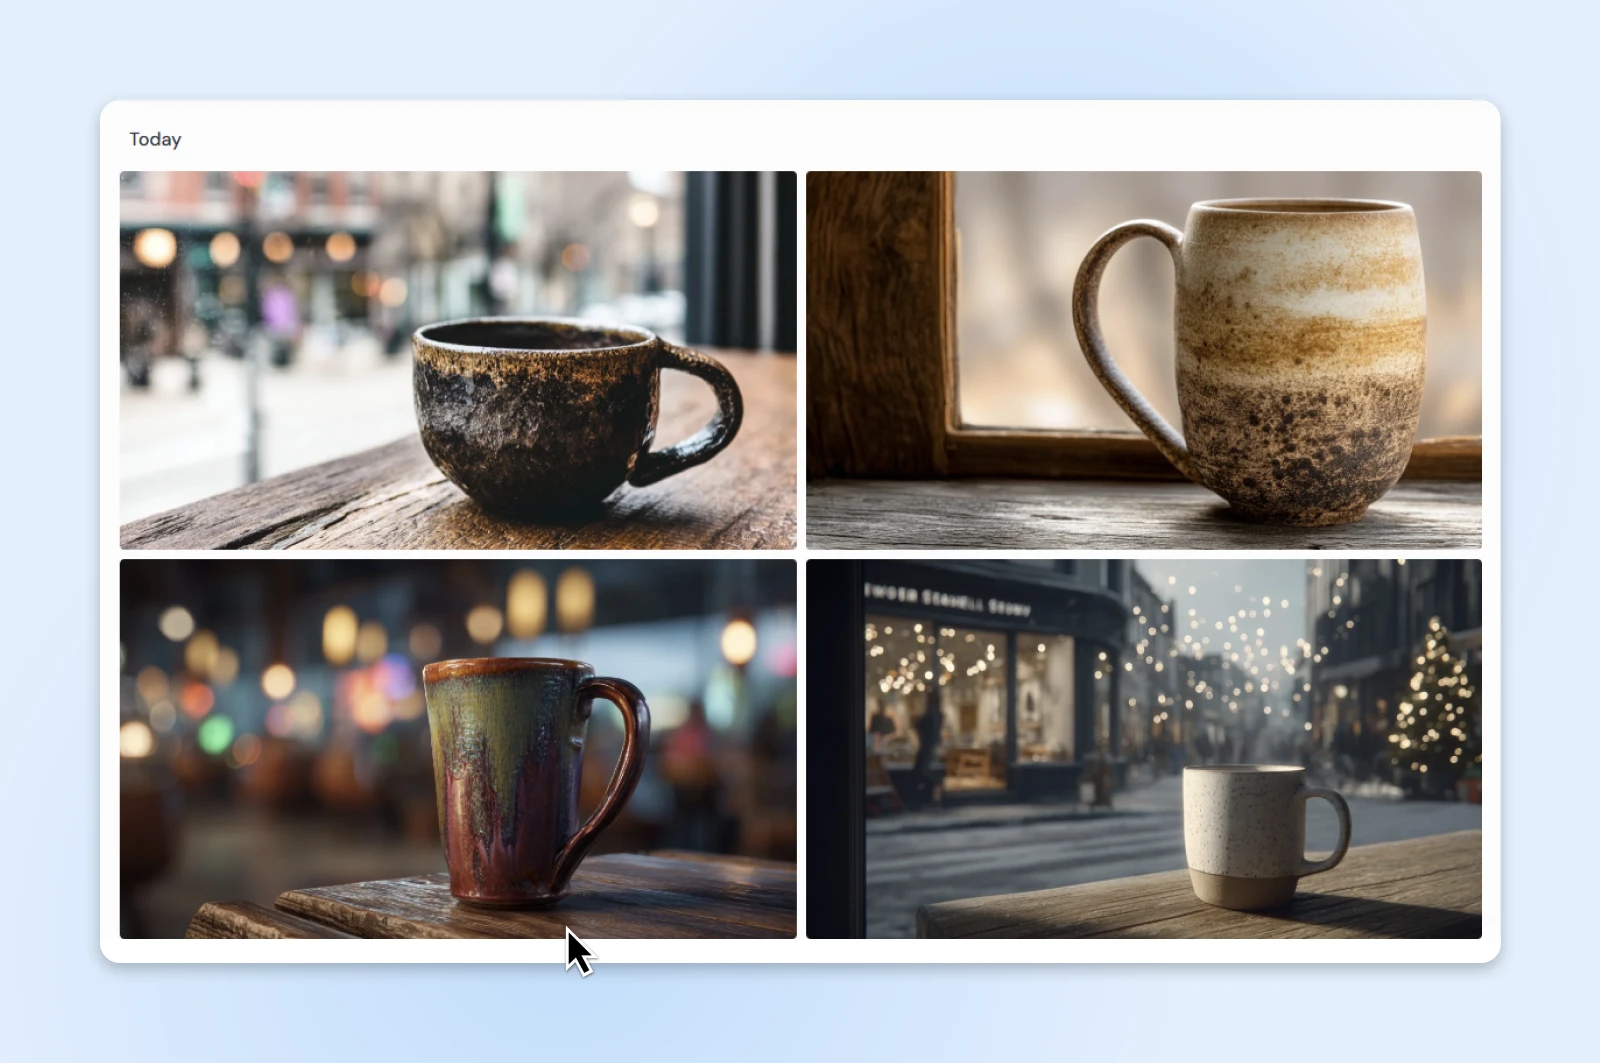
Once you select the image you like, you’ll see options for customization, as well as the “Animate Image” options at the bottom of the menu.

Step 4: Choose “Auto” for Your First Run
Auto writes the prompt for you, so it’s a good way to experiment when creating your first AI video. Manual lets you describe movement in plain English (for example, “slow 360-degree turn”).
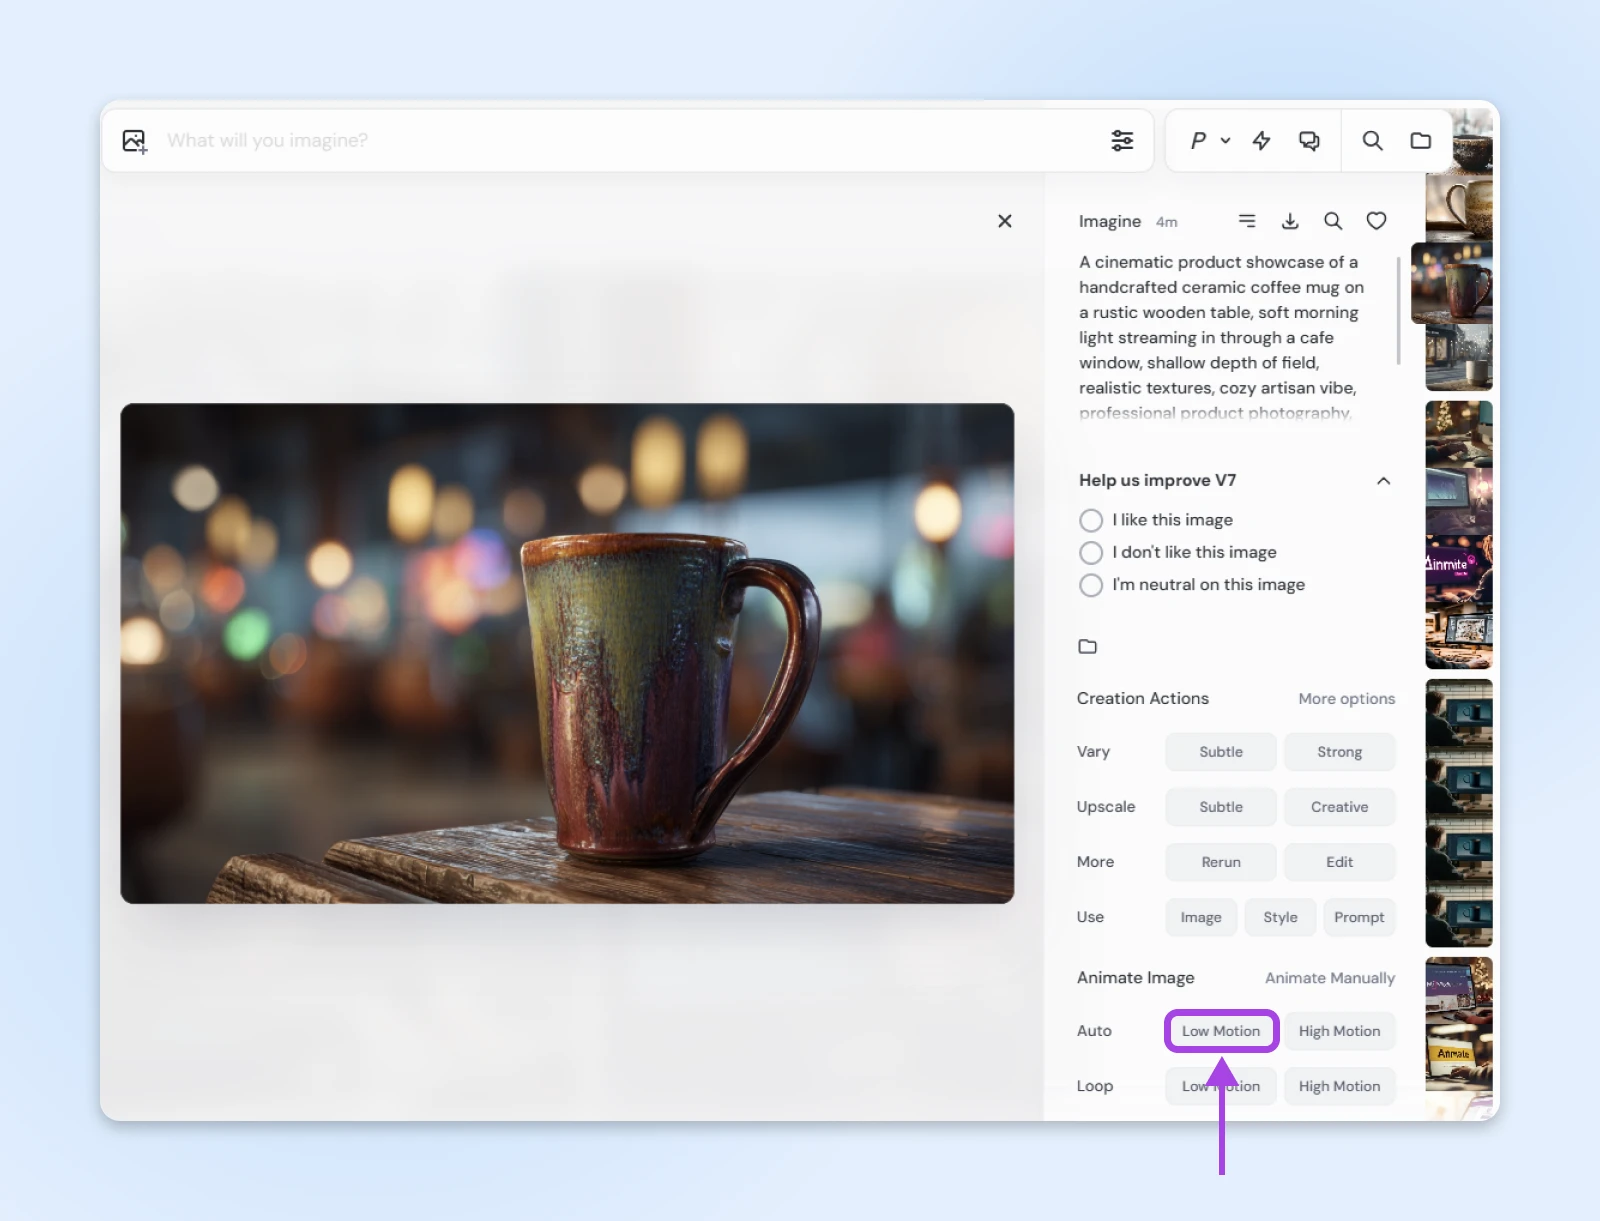
Stick with “Low Motion” if you want a subtle loop, or switch to “High Motion” if you’re looking for camera swoops or bigger subject movement.
Here’s how it came out:
Step 5: Take a Break
On Fast mode, generating one five-second video takes around three minutes. Grab a coffee or a snack, or take a bathroom break.
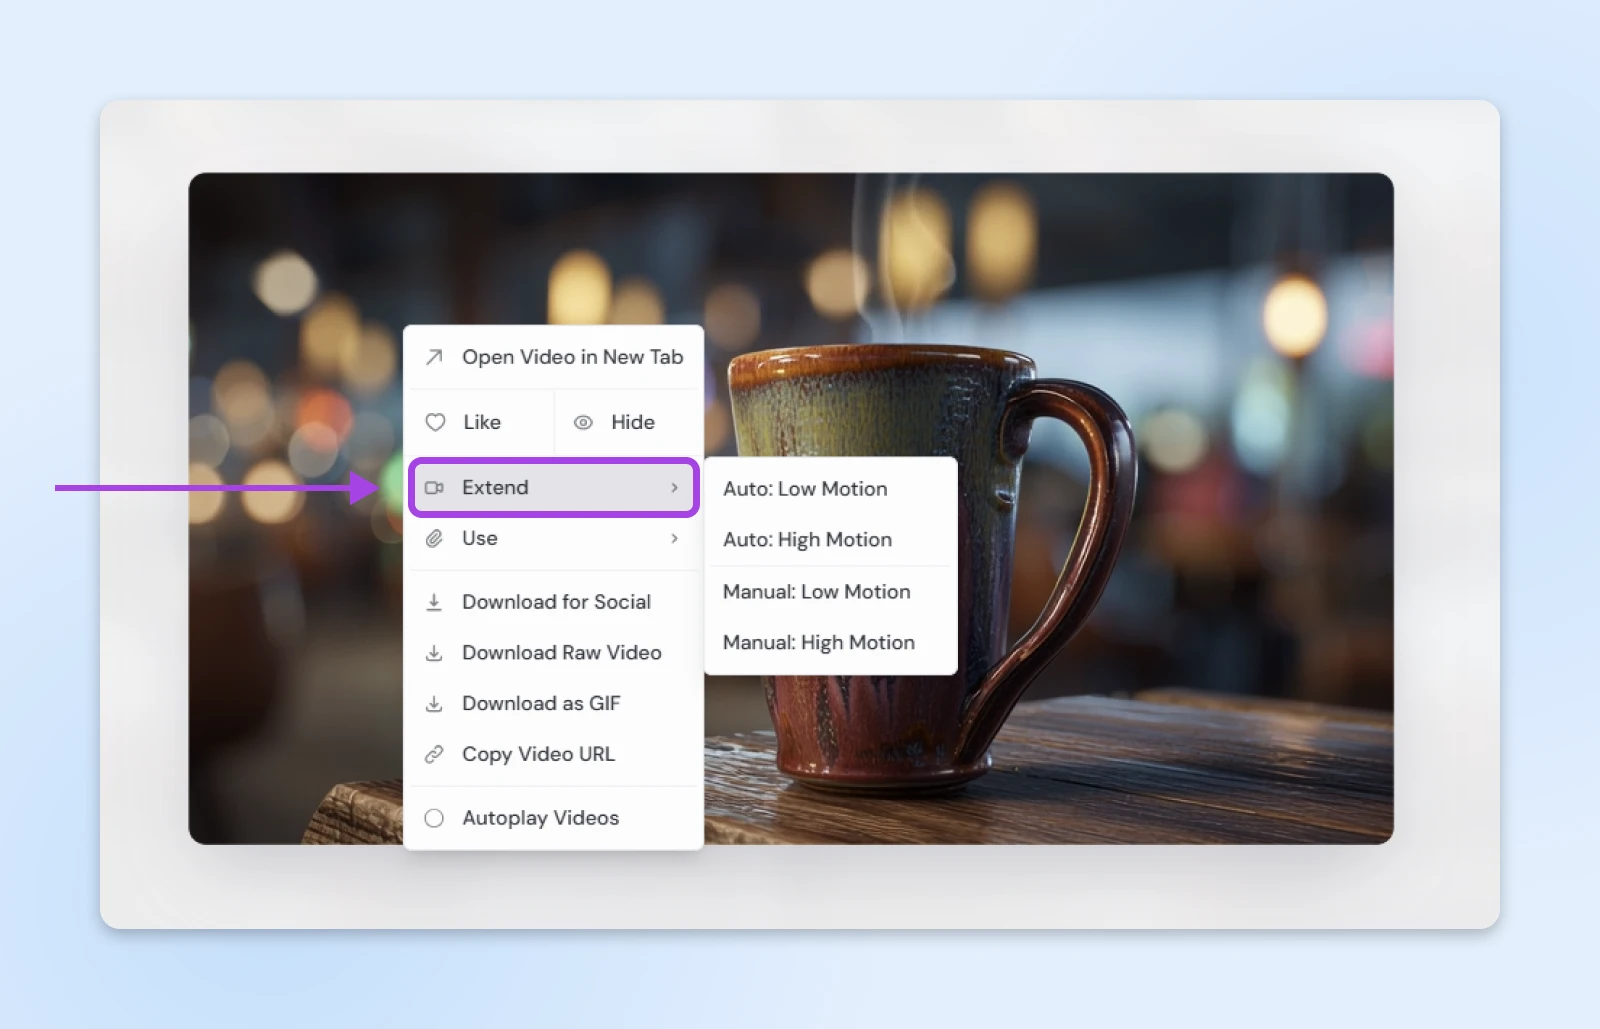
Step 6: Extend or Loop
If you need longer footage, right-click on a finished clip and select Extend Auto, which adds four seconds at a time to the video’s length, or Loop, which aligns the first and last frames for a seamless start and end to your video. You can stretch a clip to a maximum of 21 seconds.
Step 7: Download and Compress
Once you’re happy with your video, download it and check the size. Use a third-party tool to shrink it to under 5 MB so it won’t slow down your page load times.
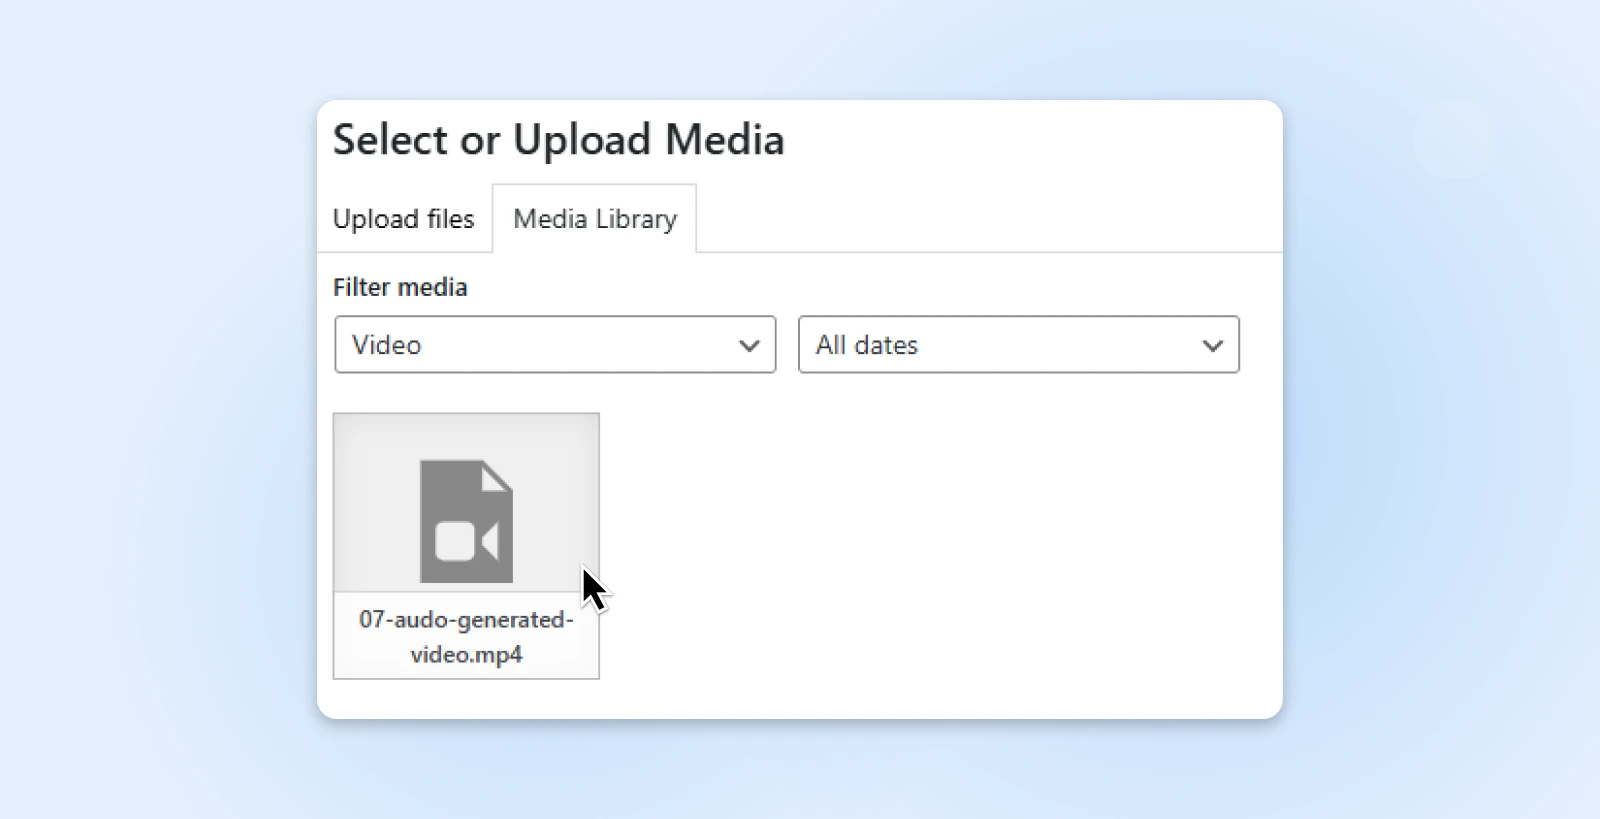
Step 8: Upload to WordPress
Add the video to your media library.
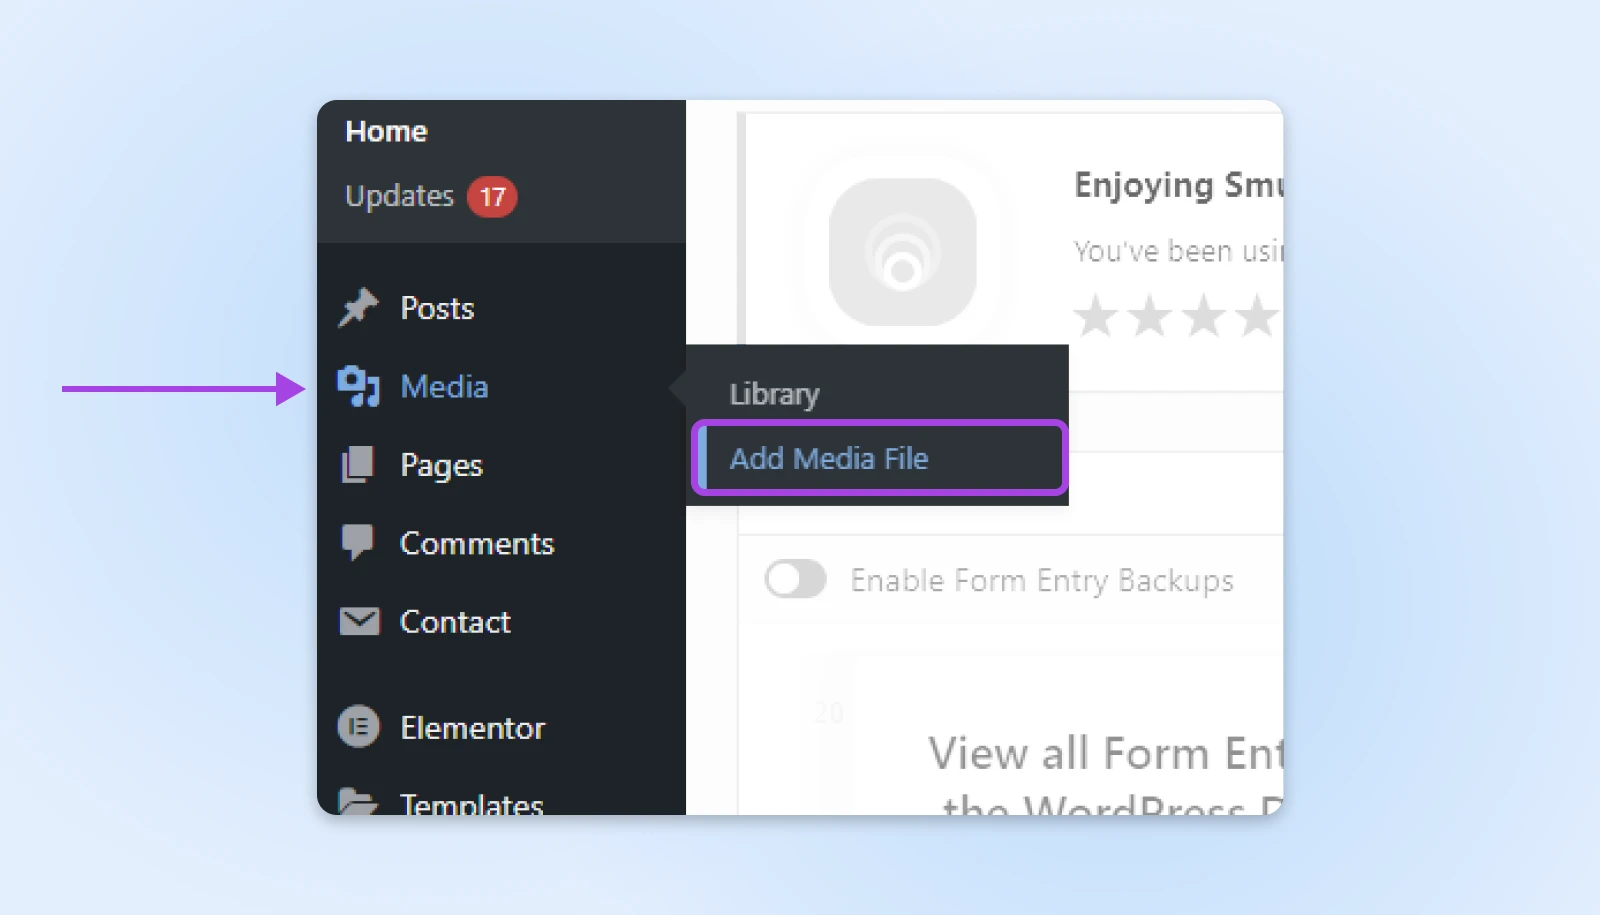
Then drop it into the page where you want it — whether it’s for a product page or a new hero for your homepage.
Step 9: Don’t Skip Accessibility
Include alt text that describes the motion (for example, “5-second loop of rotating ceramic mug”) for accessibility. And, if there’s voice-over, provide captions.
Step 10: Check Your Load Time, Then Iterate
If the video loads in less than one second, you’re good to go. If it takes longer, it could increase your bounce rate. In that case, lower the bitrate or shorten the clip, re-export, and try again.
Once you’ve mastered the basics, you can take things further with the manual Animate option, which lets you control the camera movement and subject motion yourself. For comparison, here’s a clip we created using that approach.

We clicked the checkbox to turn on Loop and changed the Motion setting to High.
Here’s what we got:
Is Midjourney Worth It?
Hiring a crew to shoot polished marketing footage isn’t cheap. Industry surveys indicate that a live-action product demo costs between $1,000 – $3,000 per finished minute. However, with Midjourney, you can purchase the $ 60-per-month Pro plan and receive unlimited Relax video minutes. As long as you have the time to wait for the videos to generate, the savings can be immense.
The bottom line: If you only need a handful of short clips each month and are okay with 480p outputs or paying for an upscaler if needed, Midjourney’s V1 Video model pays for itself.
From Static to Cinematic
Five-second clips won’t replace a full production crew, but Midjourney’s V1 Video model does something most AI toys only promise: make useful motion content extremely accessible. If you can upload a photo, you can create a very decent product video —a spinning mug, a burst of confetti, or a model showing off perfectly fitting apparel —all in less time than it takes for DoorDash to arrive with lunch.
Most importantly, your competitors are already experimenting with AI tools. At just $10 a month for a Basic plan, the question is, can you afford not to? If you’re ready to give your site its own sizzle reel, fire up Midjourney, run through the roadmap you just learned, and drop the finished MP4s into your website.
And while you’re at it, check out other AI tools that can help you level up your small business, like our Liftoff AI Website Builder.
Did you enjoy this article?

