How to Wireframe a Website: The Guide for Non-Designers

How do you go from a money-making idea, or even an existing business, to a website that brings it to life online?
And, to add yet another element to the equation, how do you do it without any design training or expertise?
A critical step in making a website is one that you may have never heard of before — wireframing.
via GIPHY
Wireframes streamline the process of planning and creating a website, so you can ensure your final product is beautiful, incredibly easy for visitors and shoppers to use, and doesn’t incur any costly surprises or delays.
Even if you haven’t heard of this approach, the great news is wireframing doesn’t require complex design tools or a career in user experience…just an understanding of the technique, a solid strategy for pulling it off, and a few pointers on what to avoid so you don’t get into the weeds of web design where it’s easy to become lost.
Don’t wing it, wireframe it. We’ll show you how, right now.
The What and Why Behind Wireframes
A wireframe is a simplified, visual guide used in the early stages of designing a website, app, or digital product. It outlines the basic structure and layout, focusing on functionality and user flow rather than specific visual design elements.
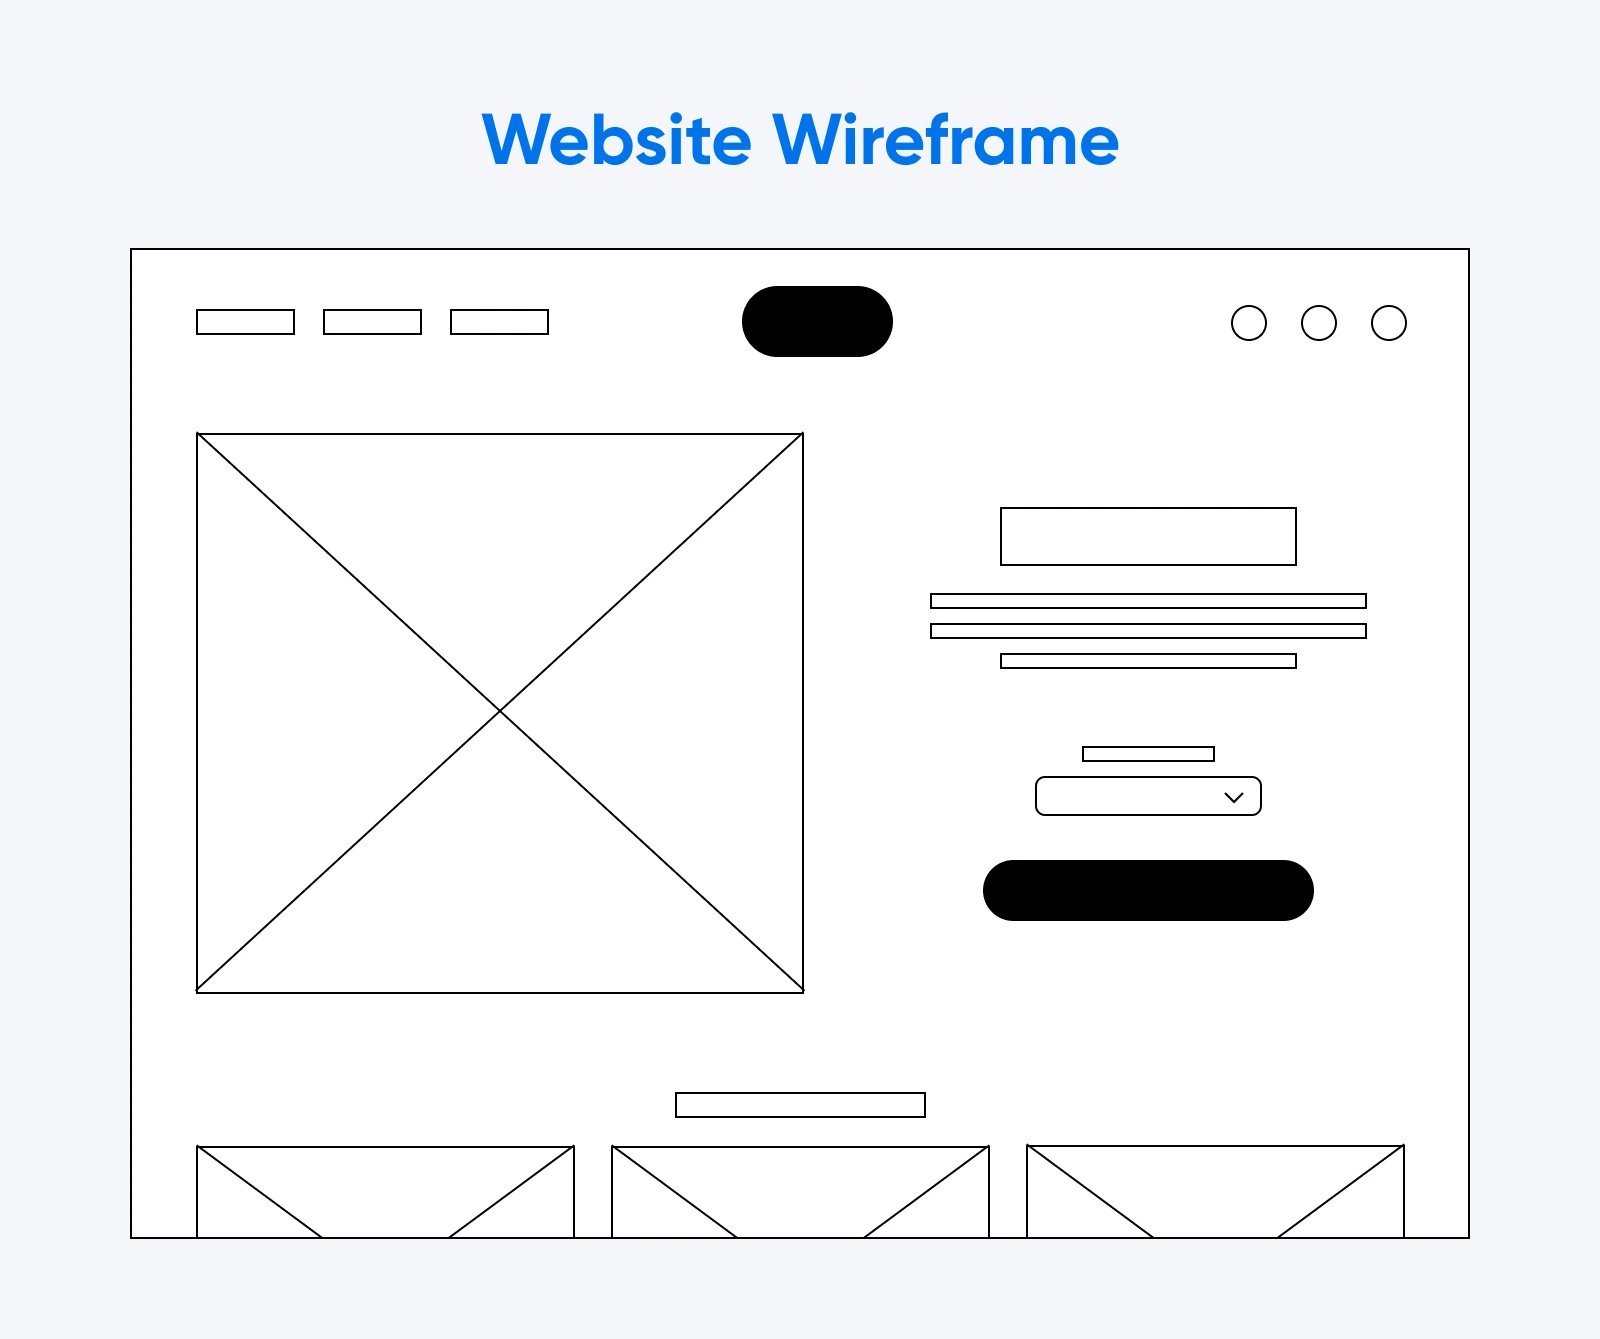
The purpose of a wireframe is to map out key components (think menus, buttons, and content areas) and show how these elements relate to one another. By stripping away decorative details, wireframes help you work through and eventually clarify the reasoning behind layout and design decisions: creating a strategic foundation for a rock-solid final website.
Here are just the top most important reasons to take a sec and invest a little time and energy into this phase of the website creation process.
Save Money and Time
Making changes and fixing mistakes on a wireframe is much simpler, faster, and more affordable than fixing them on a fully-designed and launched website!
Optimize the User Experience
Wireframes can help you gather feedback from real potential users as well as professional designers, so you can really nail down the design, functionality, and overall user experience (UX) before the build even begins.
Prioritize Your Assets and Goals
Wireframing is to website building what outlining is to essay writing. It helps you organize your website’s assets, establish a clear hierarchy that prioritizes your most critical features and information, and ensures every design decision is aligned with your ultimate website goal —from creating brand awareness to making online sales and everything in between.
Creating your first website wireframe will take time. However, taking that time to iron out issues now will give your site a much better chance of winning over browsers down the line.
Here’s how we recommend you invest your upfront time for maximum impact.
1. Conduct Target User and UX Design Research
Before you officially start drafting your wireframe, it’s helpful to do some research.
For starters, you’ll want to know who your target audience is, to help determine which features need to be most prominent on your site so that visitors can find what they need.
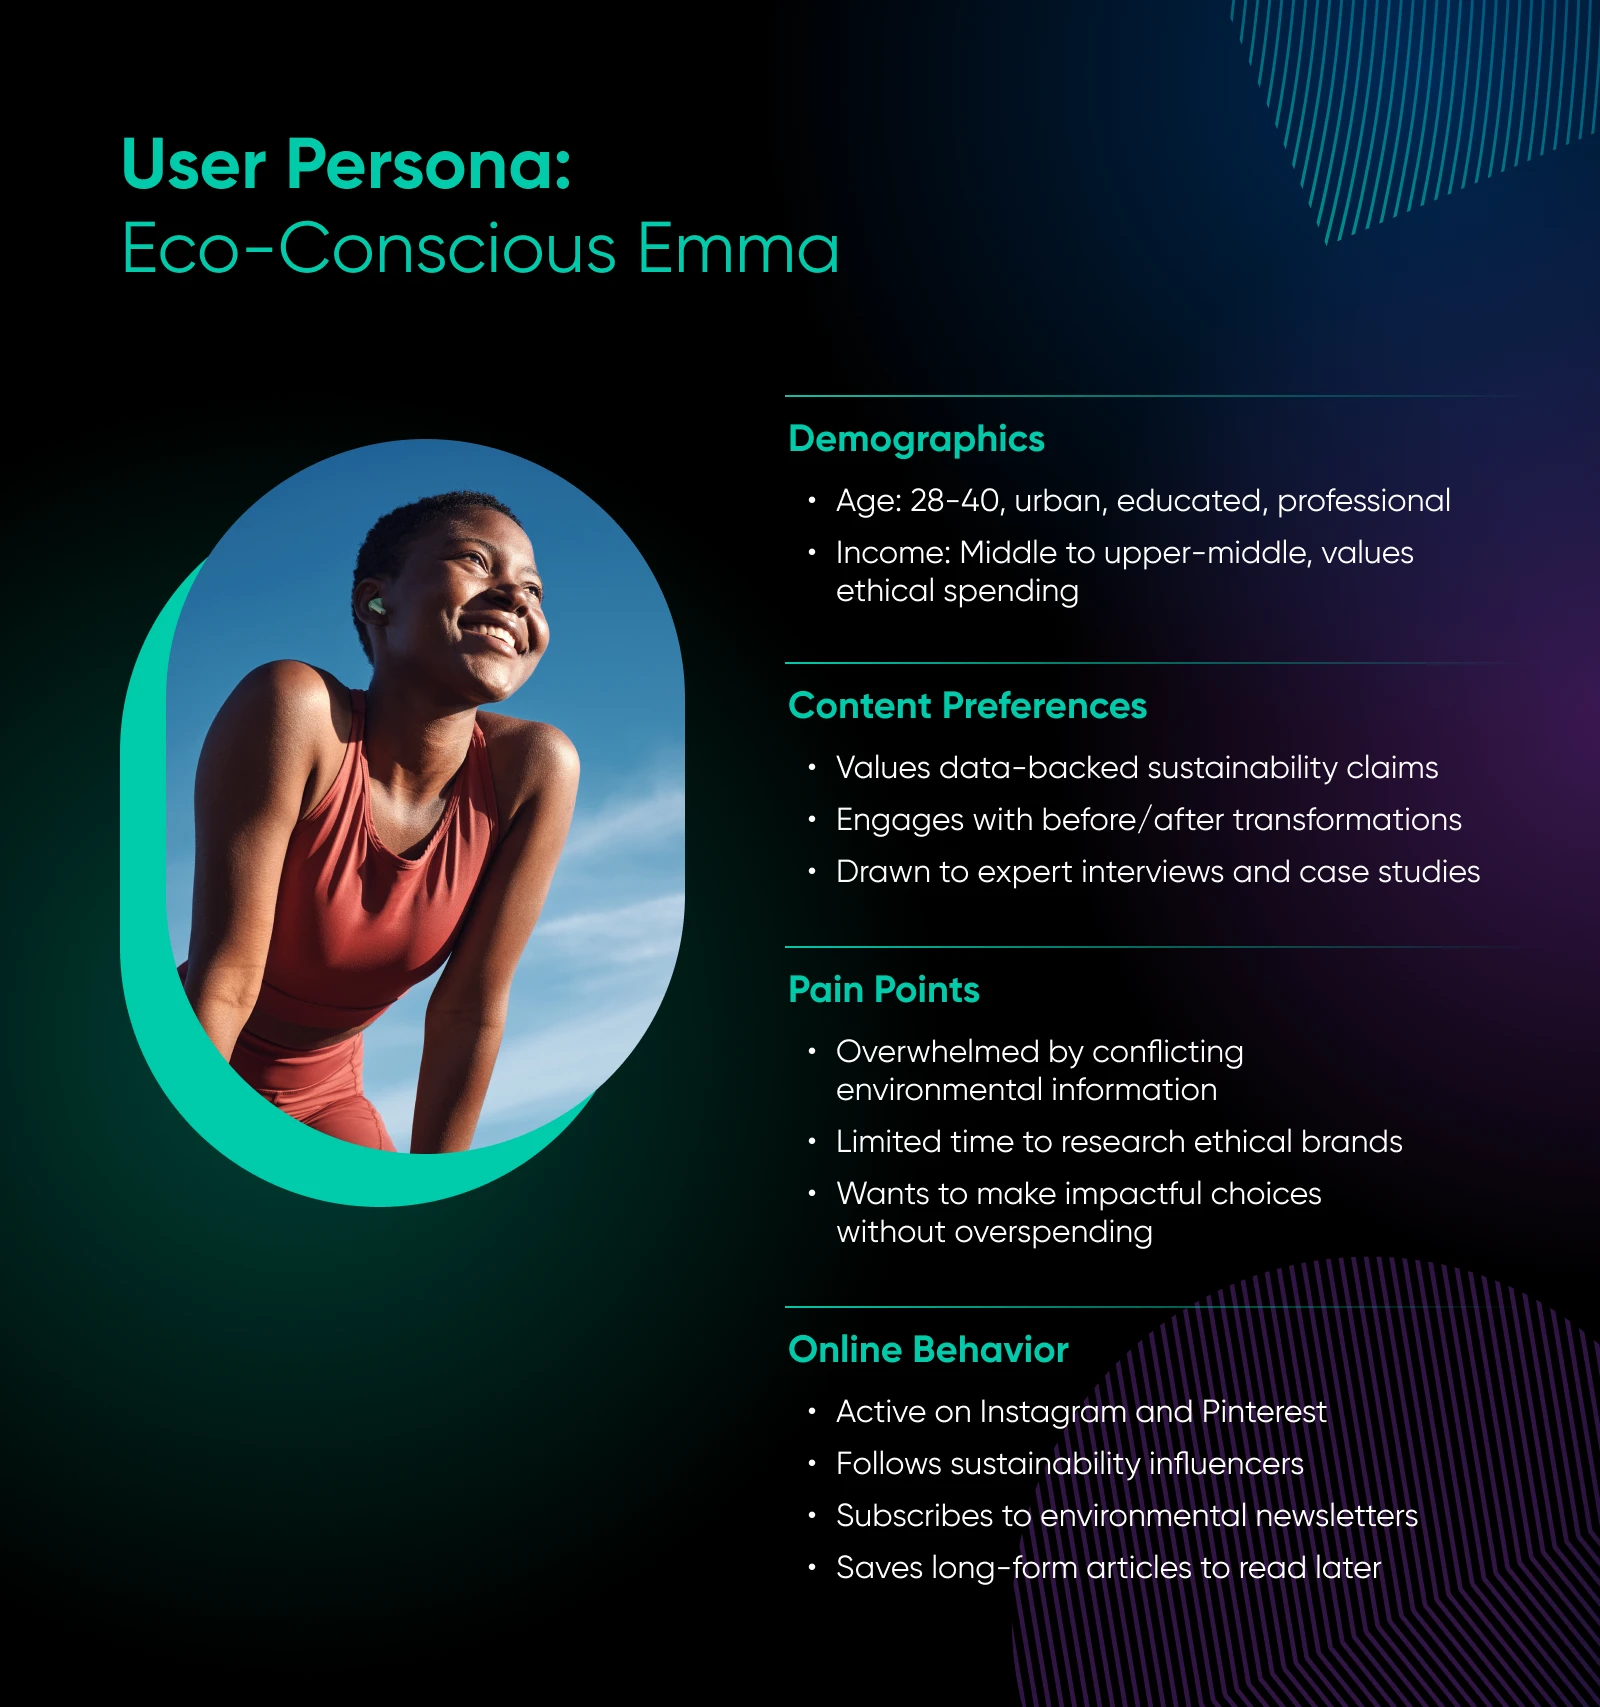
User personas can be a helpful design tool for this process. Try creating some for your potential user groups so you have a reference you can return to throughout the wireframe design process. Personas can also help create a marketing strategy later on, so hang on to them.
It’s also wise to brush up on the core elements of web design. You don’t want to go too far outside the box when it comes to designing your site, as users find it easier to navigate a website that generally follows conventions.
At the same time, you don’t want to completely ignore current UX design trends. Conduct an internet search to find an up-to-date article detailing what’s “in” for cutting-edge and well-performing websites.
Together, this research and persona planning will provide insights into what you want to eventually include on your website and how it could be laid out.
Related Article: How To Find and Engage With Your Target Audience Online
2. Determine Optimal User Flows
A user flow refers to the path a visitor takes to complete a specific goal on your website. So, for example, if you have an e-commerce site, one user flow might extend from a specific product page to the end of the checkout process.
Determining the key tasks users must complete on your site can help you create the most straightforward user flow for each potential goal. These flows will then tell you what kind of content and interactions your website needs —creating the skeleton of your soon-to-be wireframe.
That said, it can be hard to get into the mind of a hypothetical user. Asking yourself these questions can help when you’re trying to work out your primary user flows:
- What problems do you intend to solve for users? What goals might they be hoping to achieve by coming to your site?
- How can you organize your content (such as buttons, links, and menus) to support those goals?
- What should users see first when they arrive on your site, which can help orient them and let them know they’re in the right place?
- What are the user expectations for a site like yours?
- What call to action (CTA) elements will you provide, and where can you place them so users will notice?
3. Draft Your Wireframe
Now that you’ve gathered the key information for your wireframe, you can start drafting.
Keep in mind that the purpose of this task is not to create a complete design for your website. You’re focusing solely on UX and how you can create pages that are easy to navigate as the user moves toward a conversion.
To that end, your wireframe should include features and formats that are important to how your users will interact with and make use of your website. These might include:
- A layout: noting where you’ll place any images, branding elements, written content, and video players
- Your navigation menu: Including a list of each item it will include and the order in which they will appear
- Any links and buttons: That need to be present on the page
- Footer content: Such as your contact information and social media links
- Dynamic elements: Like search features and dropdowns, and how they’ll interact with the rest of the site
Your answers to the questions in the previous step will likely help with this stage of the process as well. Remember to consider web design conventions (especially when it comes to website accessibility), user expectations, and information hierarchies when placing these elements on your page.
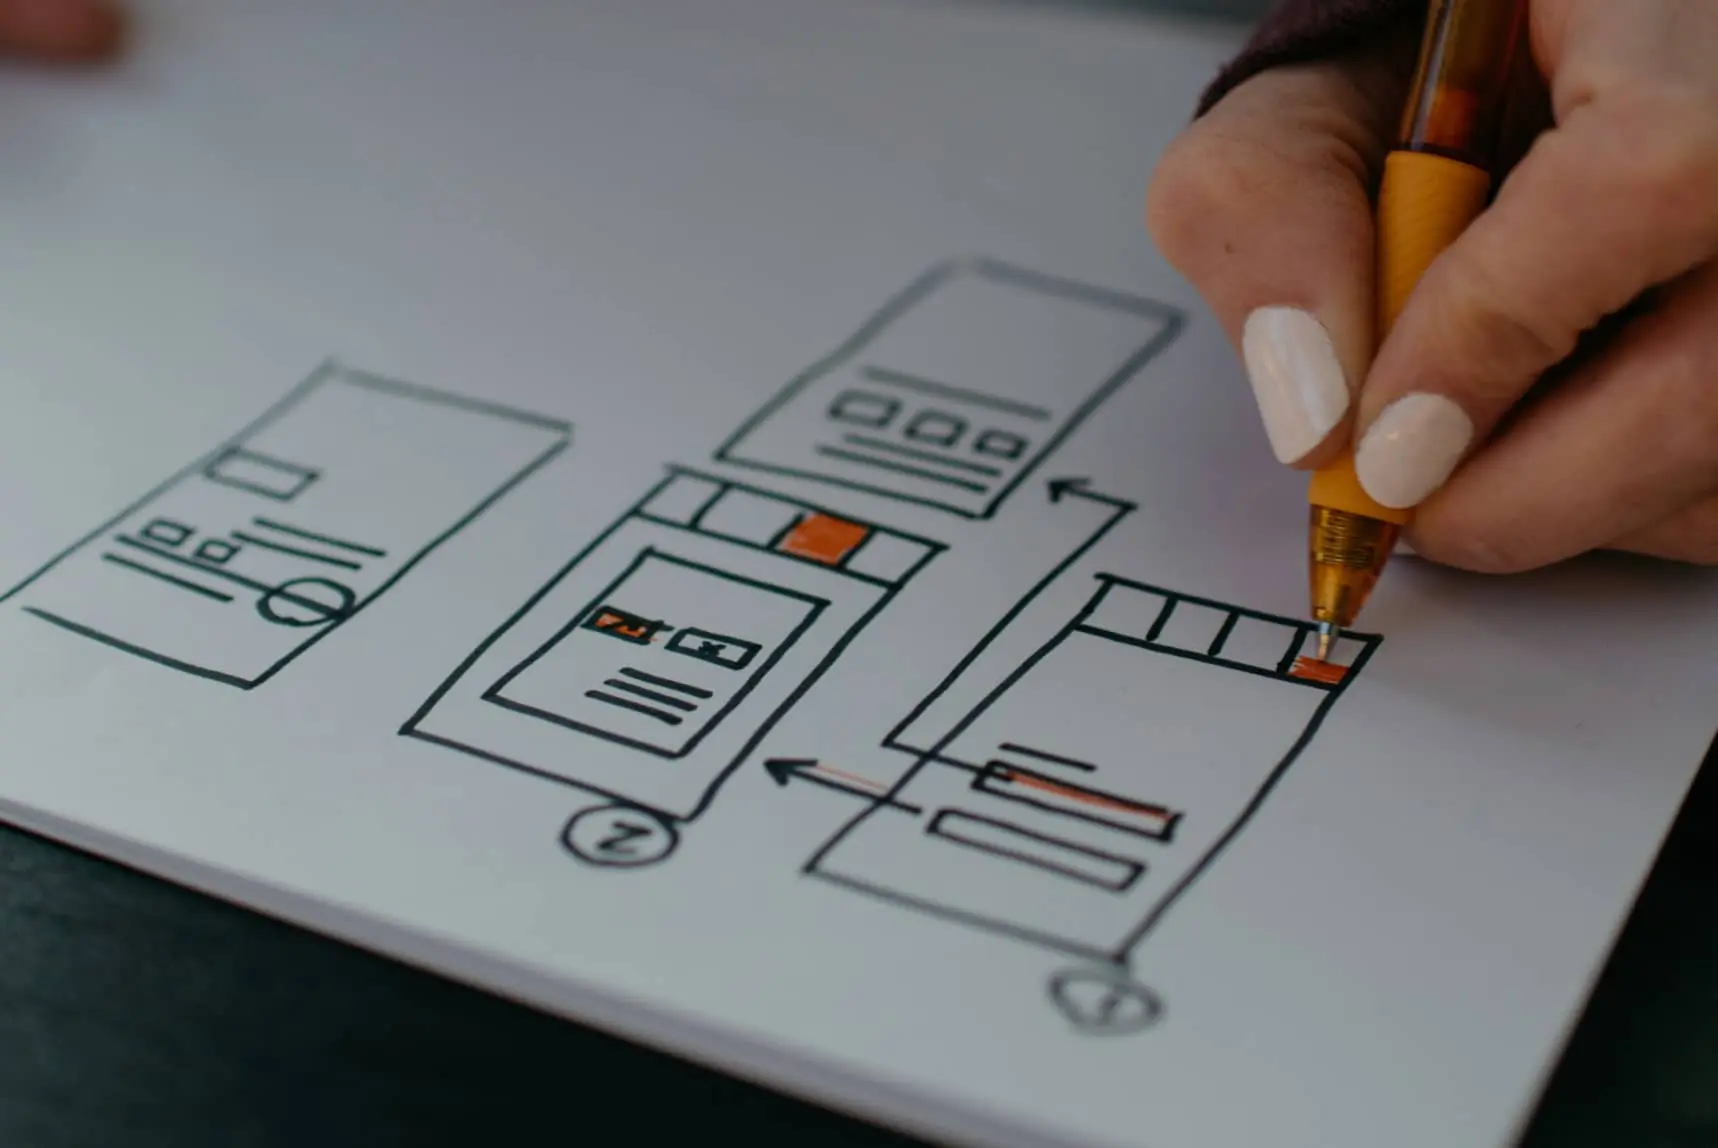
There are two main methods for creating wireframes: by hand or digitally.
If you’re going with the former option, all you need is a way to write to get started. If you prefer a low-tech solution, paper and pen, whiteboard, or even sticky notes and a blank wall are a great way to kick off a simple wireframe for brainstorming. You can always upgrade to a more detailed and functional version later using digital wireframing tools.

If you plan on building your website yourself following the wireframing phase, you may not need to ever create a more robust version of your wireframe. However, if you’ll be bringing in anyone else for the technical creation, it will be helpful to move your first draft onto a platform where it can be shared and evolved.
Here are some tools for getting your wireframe online:
Wireframe.cc
For first time wireframers, a free tool such as wireframe.cc is a great fit. You can create easy designs with the drag-and-drop interface and annotate your drafts so you don’t forget important information.
Wirify
Another option is Wirify, a bookmarklet that you can add to your browser. This tool’s interface turns existing web pages into wireframes. Use it to create examples upon which to base your own new wireframe, or apply it when redesigning an existing site.
Balsamiq
If you’re willing to spend a little money, you might look into Balsamiq. It boasts an easy-to-use, collaborative wireframing interface, great for business owners who intend to collaborate on wireframes.
4. Turn Your Wireframe Into a Mockup or Prototype (Optional)
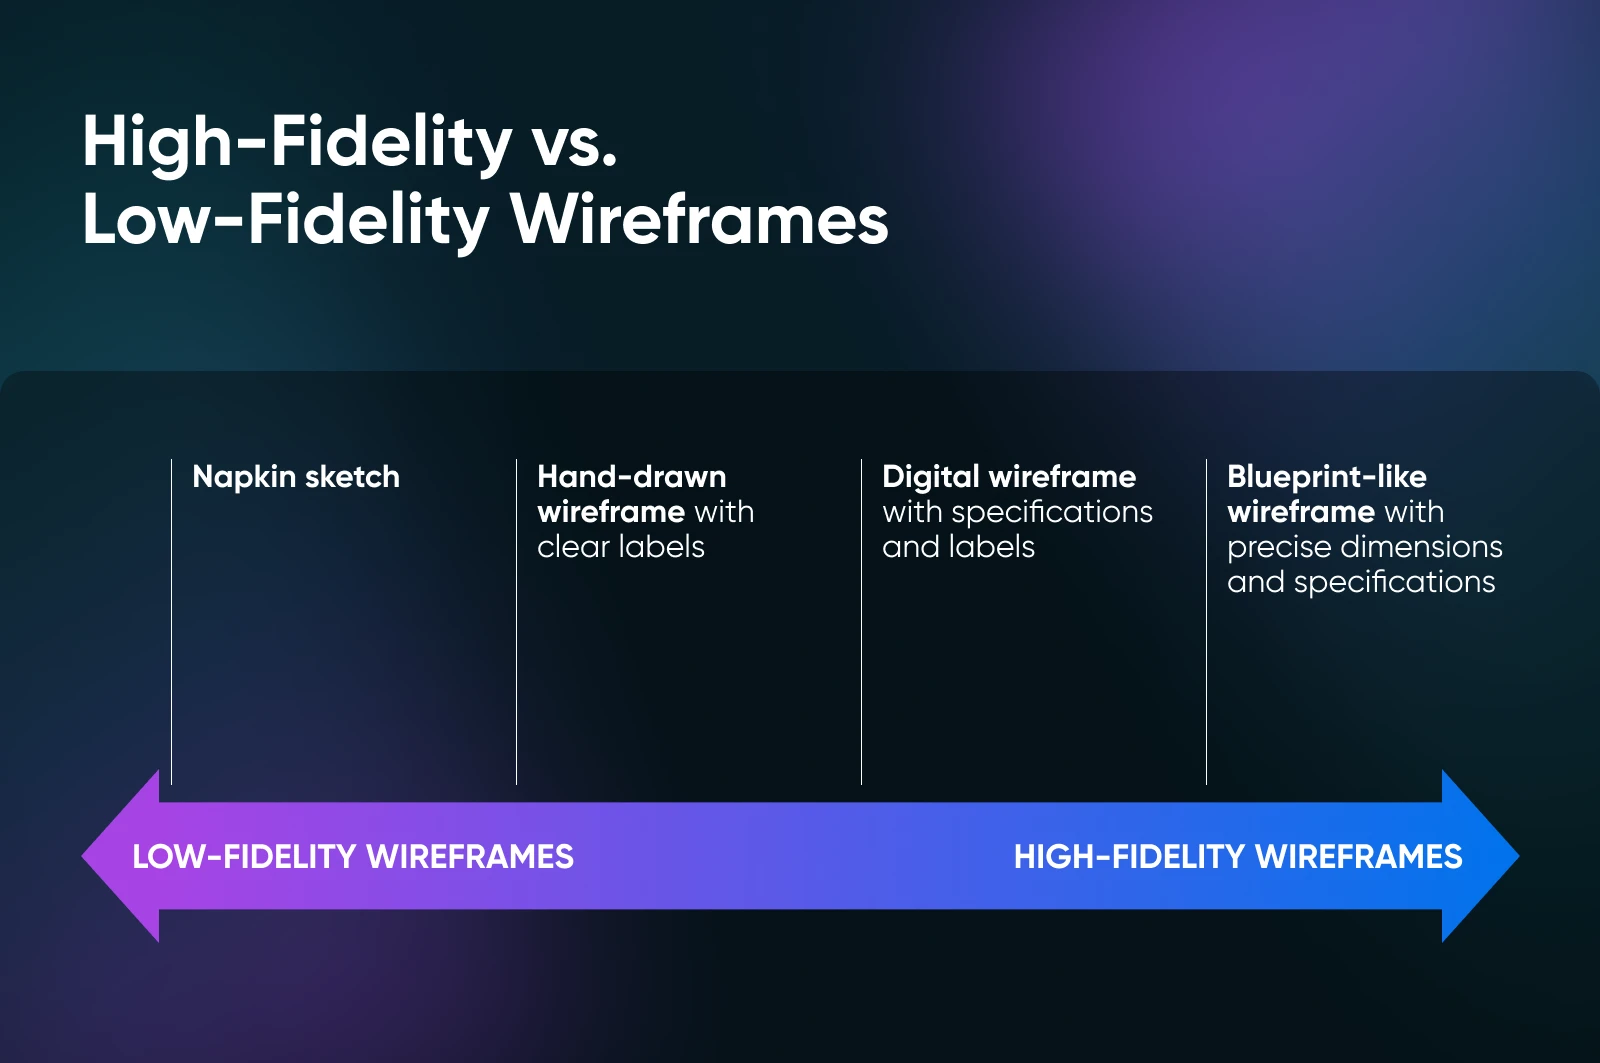
Wireframes can exist anywhere on the spectrum between low-fidelity and high-fidelity designs.

Low-fidelity wireframes may be as simple as a hand-drawn sketch on the back of a napkin, illustrating the basic layout and information architecture of a page or product.
High-fidelity wireframes could include extremely specific details, like exact specifications and pixel placement. It might end up looking more like a blueprint you’d use to build a house.
Where your wireframe lands on this spectrum depends on how you plan to use it. Just getting your thoughts in order before pulling off a DIY web design with a quick WordPress theme? You might not need to go all in on a detailed, digitized version.
But if you’re working on a more complex project you intend to hand over to a designer or development team, you may need to take your wireframe a step further.
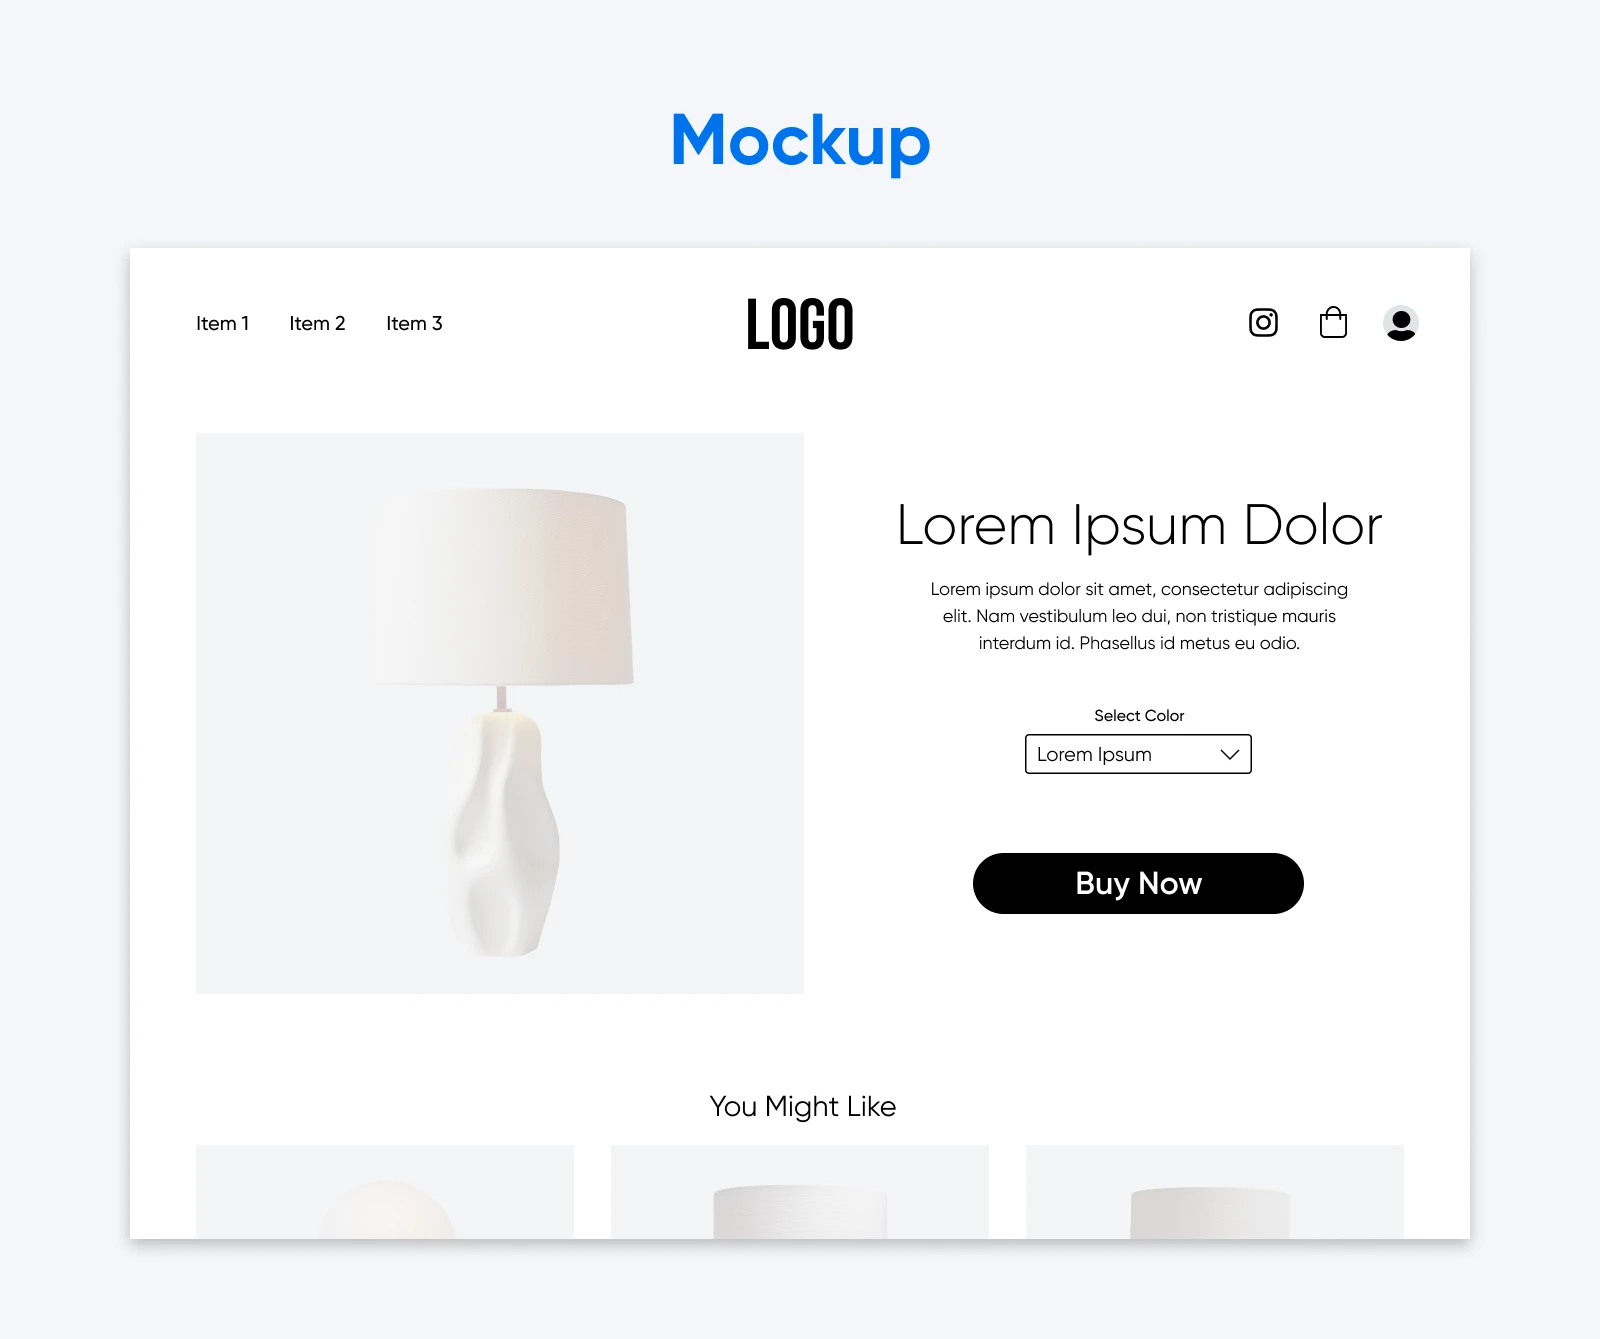
Mockups apply specific design choices to your wireframe. They generally include colors, fonts, and images to bring the design closer to completion. Or they use placeholders for things like images and text (e.g., “Lorem ipsum”).
A mockup is a static image that’s useful for understanding how the final product will look visually, but doesn’t help you understand what it will feel like to use it directly.
Here are some tools for layering a little more pizzazz into your wireframes:
Sketch
A super-flexible digital “canvas,” stackable elements, and more robust features make it easy to use Sketch to create actual design elements from scratch as well as translate dull wireframes to bright, on-brand representations of your future site.
Visme’s Mockup Generator
With templates and an easy-to-use design interface, even folks with no UX experience can use Visme’s Mockup Generator to input fonts, colors, graphics, and more to better visualize what the final pages of their websites may look like.
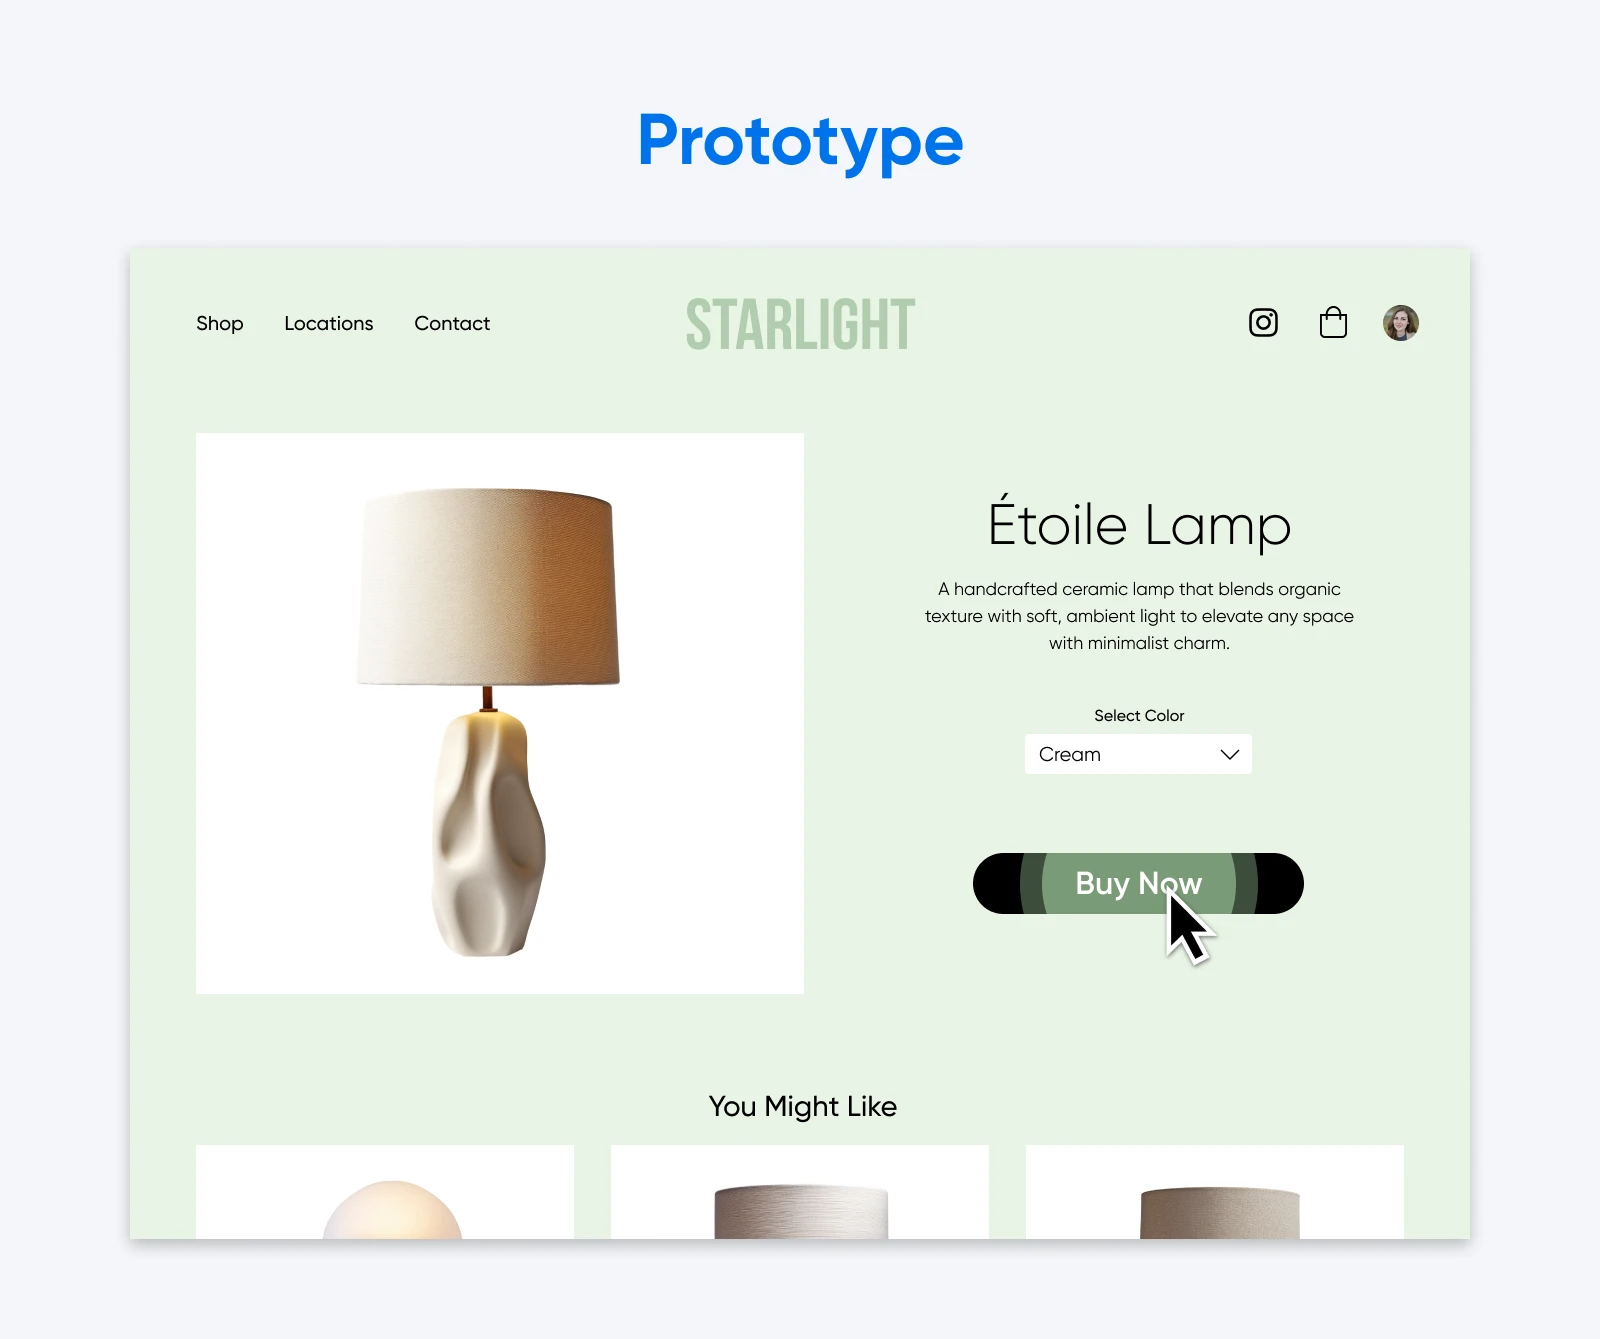
Then there are prototypes. These are semi-functional versions of a website that generally implement the planned design and some elements that allow you to test expected user behavior.
Creating a prototype is often essential for more complex design projects, as it enables you to test actual functionality and gather feedback from users.
Ready to actually bring the idea of your website to life and make those final tweaks before moving on to design development? These tools will help you build a great prototype:
Figma
Figma is a comprehensive and collaboration-first design tool that makes it easy to create simple wireframes, or even build interactive prototypes (among many other things!).
Uizard
Uizard utilizes AI to transform sketches, screenshots, and even simple text prompts into high-fidelity wireframes that you can navigate through to gain an idea of how the final website experience will feel.
5. Test, Test, Test!
Once your initial wireframe (or mockup or prototype at this point) is completed, you’ll need to conduct some testing. This will help you determine if it has accomplished its goal of mapping out your site’s most important user flows.
In addition to walking through each flow on your own, there are also tools that can provide more objective usability testing for your wireframe:
Lyssna
Use Lyssna to see how real people react to your design. You can gather both behavioral data and thoughtful user feedback to make evidence-backed adjustments that will help your future website work more effectively.
Maze
Import a design from Figma, Sketch, or another website-planning tool into Maze to obtain insights such as an overall usability score, heatmap results that show how real users navigate your layout, and even metrics like time-on-screen.
Wireframe Examples (3 Levels)
Looking for some inspiration? Here are a few wireframe examples with varying levels of detail to give direction and vision for your own work.
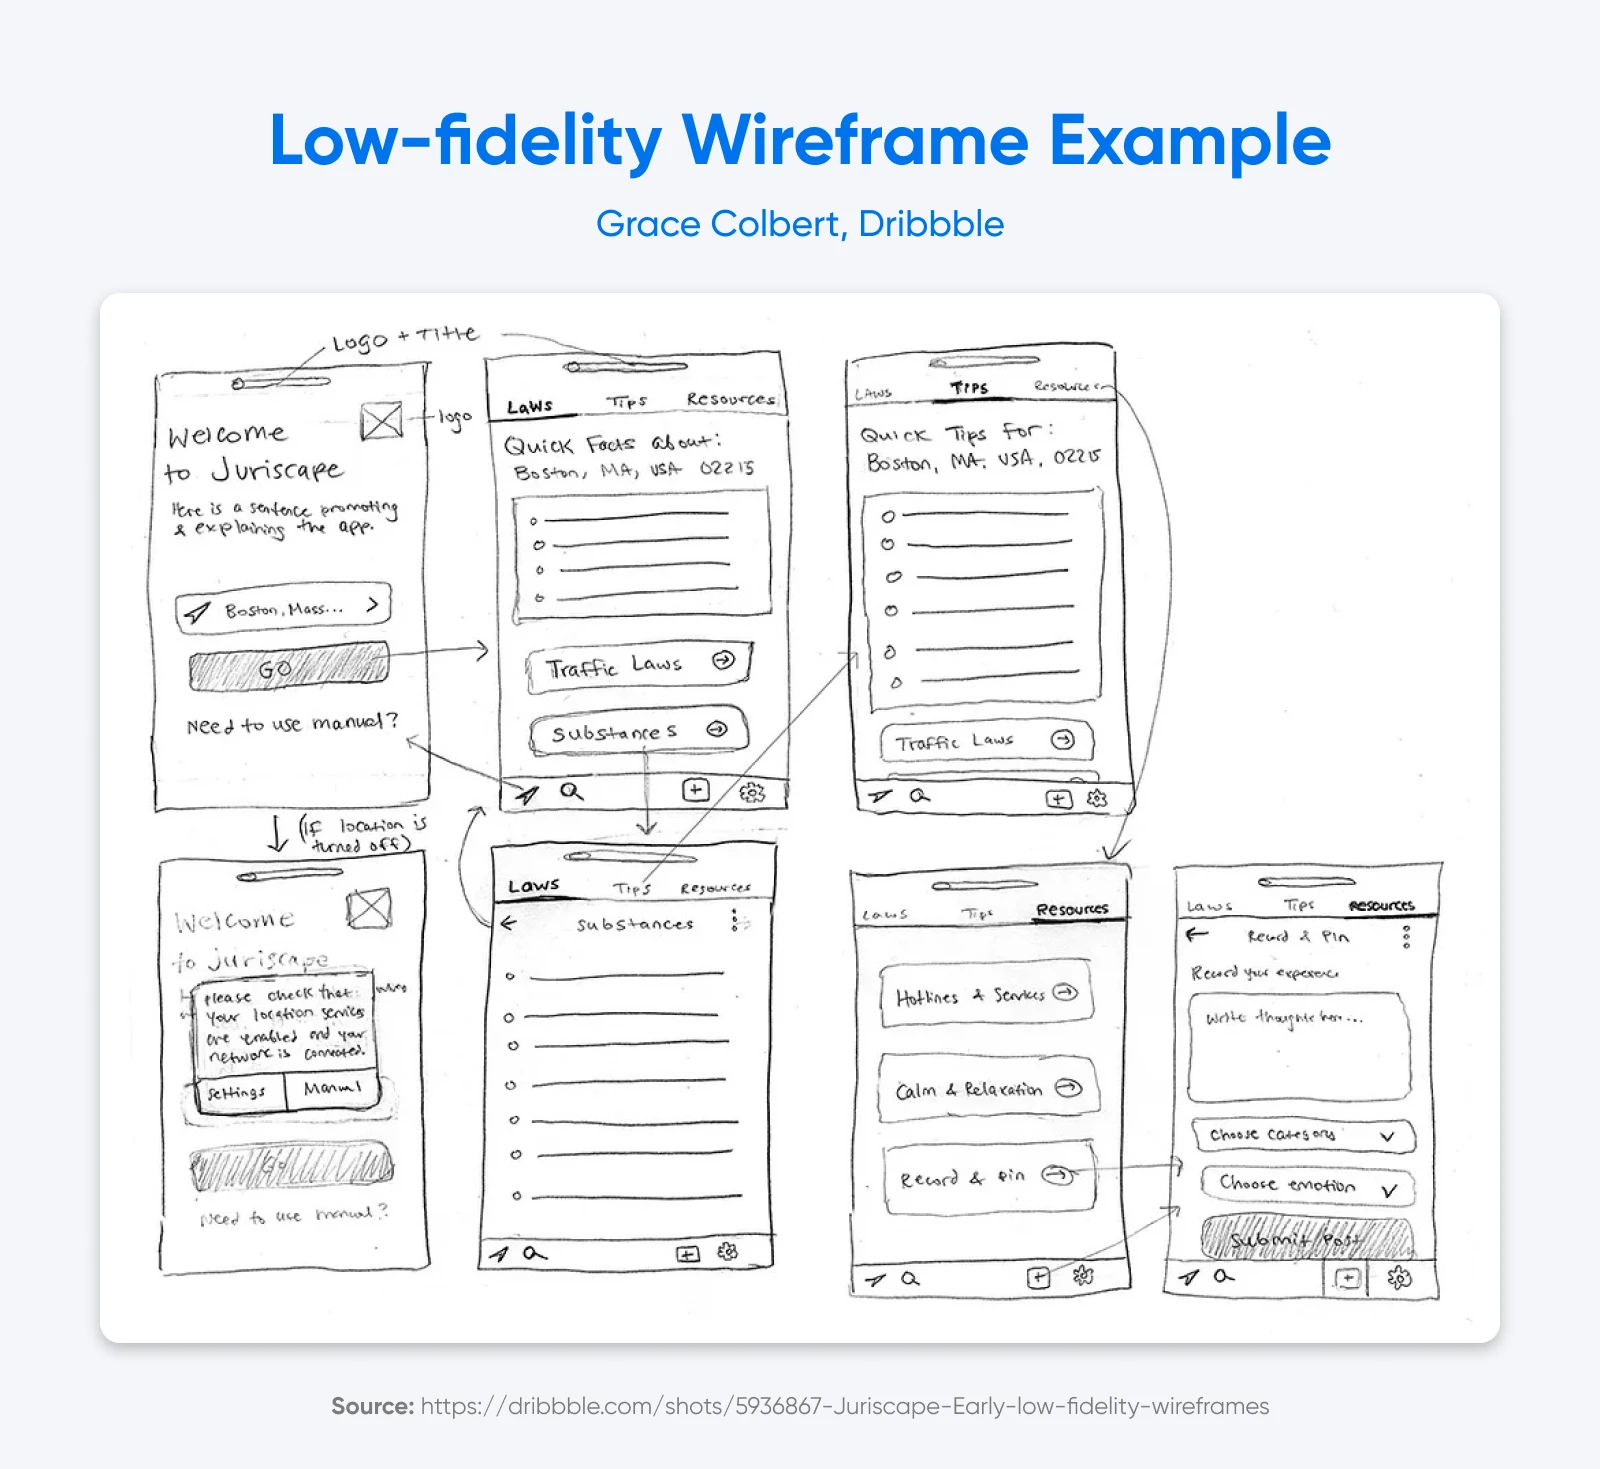
Low-Fidelity Wireframe
First up: this low-fi, hand-drawn mobile app design by Grace Colbert on Dribbble demonstrates that even the lowest-tech wireframe can effectively convey how all the different pages and features should work together.
When creating your website, this level of detail should guide you in ensuring that all your functionality is in place. It’s quick, flexible, and perfect for brainstorming or working through early ideas before locking anything in.
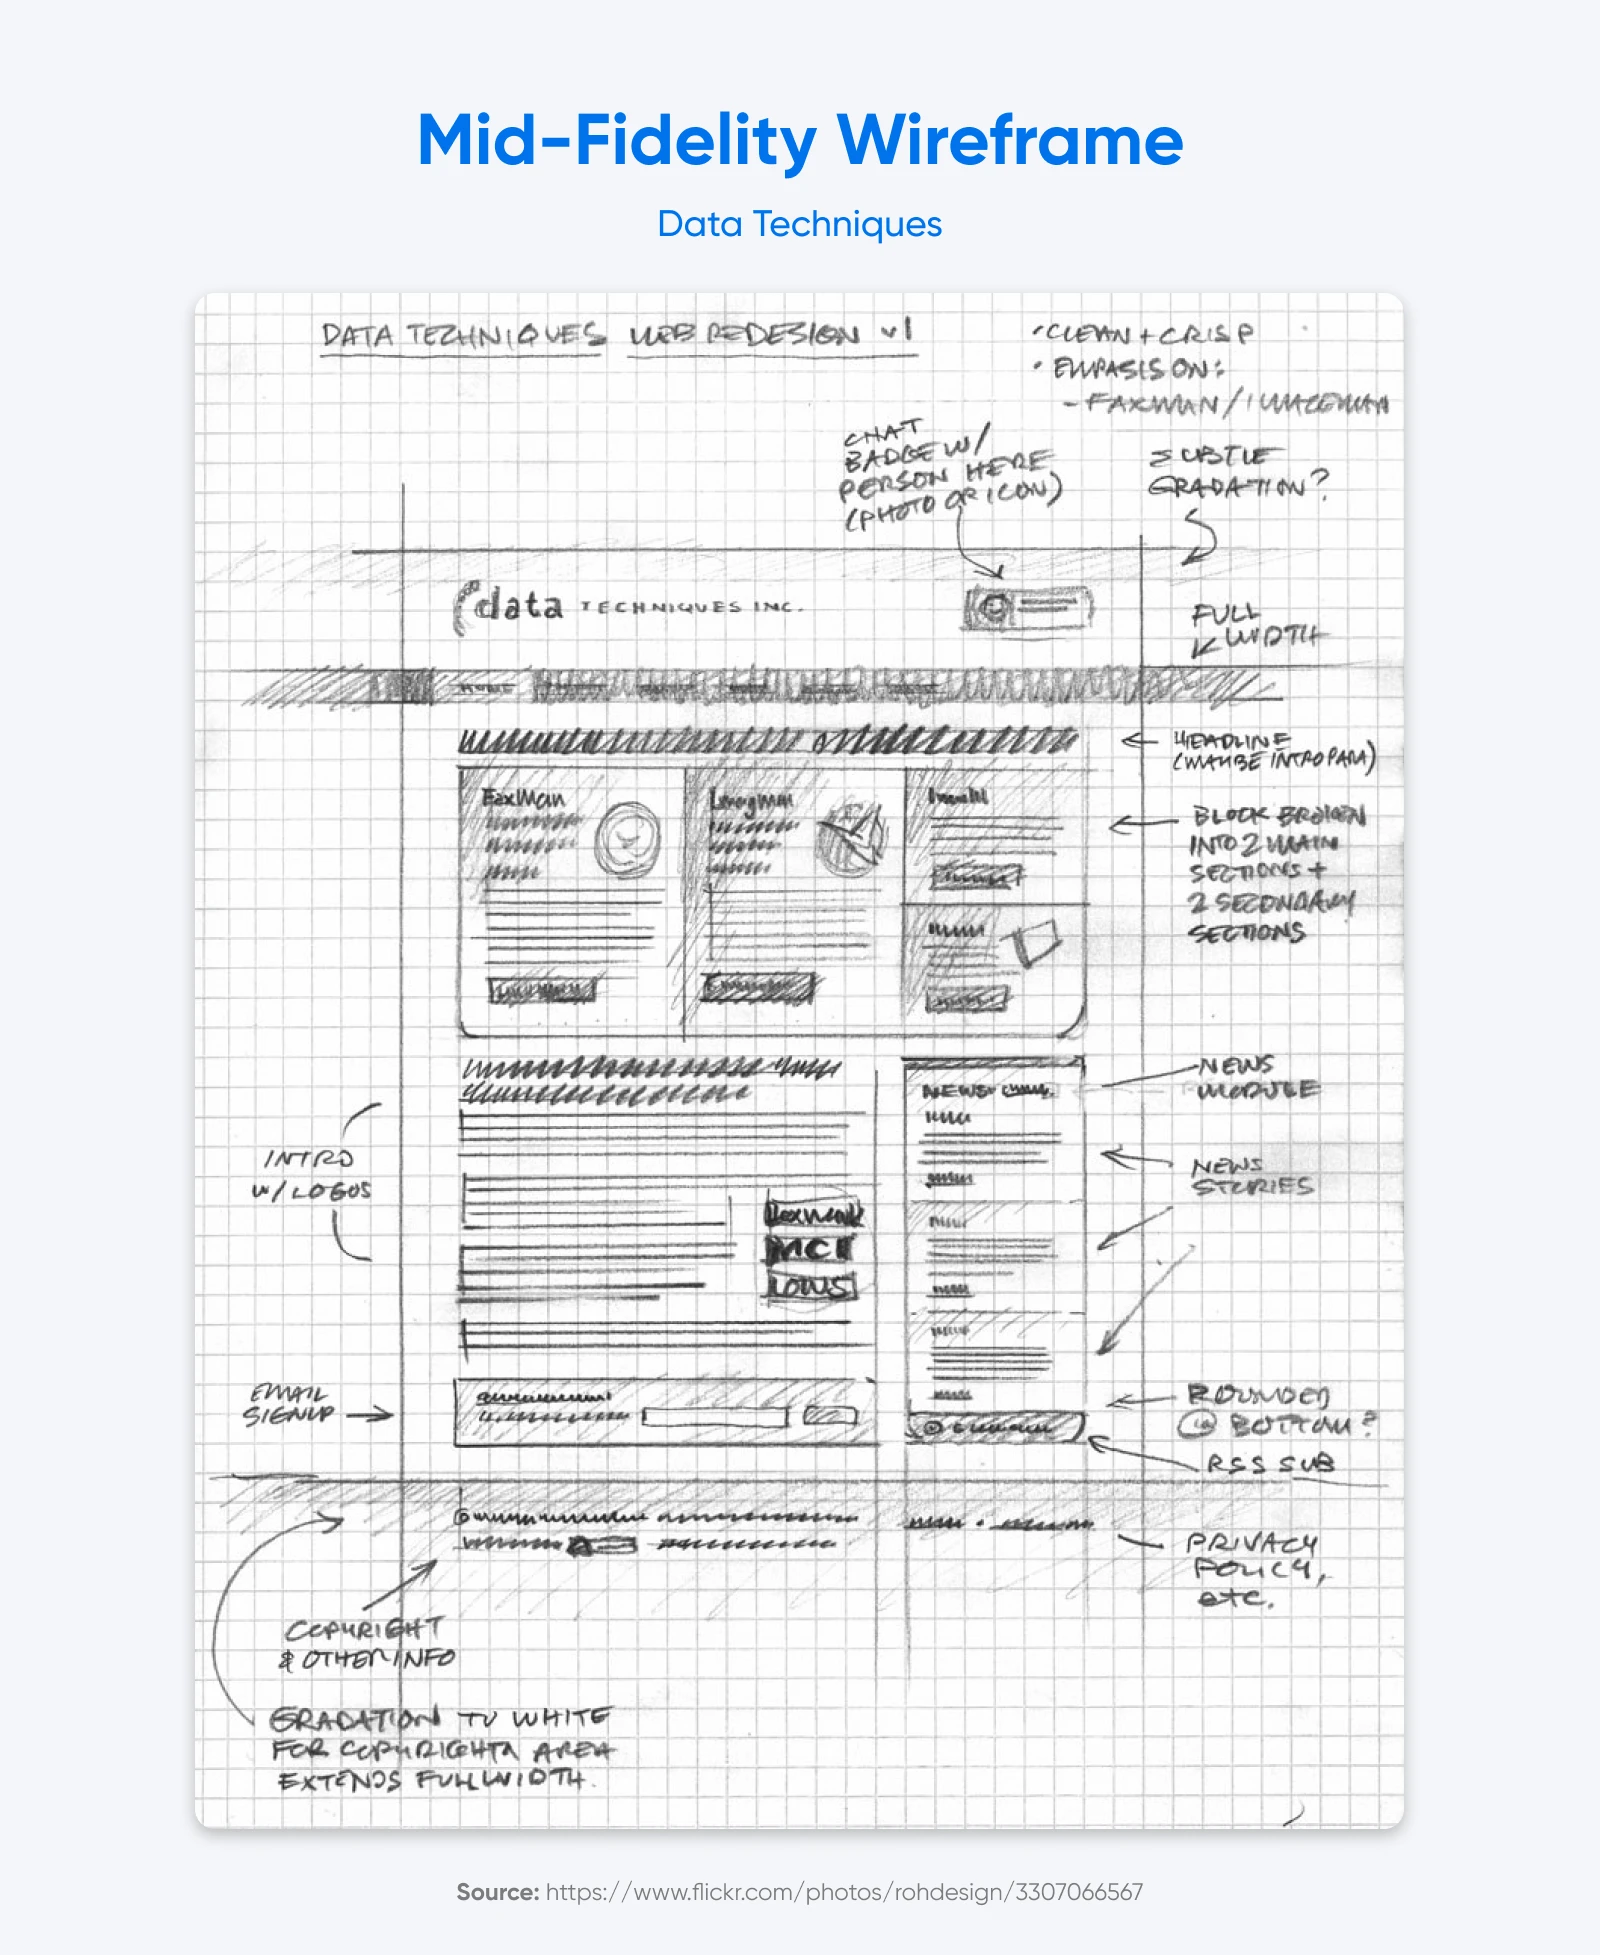
Mid-Fidelity Wireframe
This mid-fidelity wireframe for Data Techniques hits that sweet spot between napkin sketch and polished mockup. It may be hand-drawn, but the use of graph paper and detailed labeling helps keep things organized and precise. If done on a computer, it will probably stay in greyscale, to keep the focus on the layout.
Compared to a low-fi wireframe, this version adds structure, flow, and annotations that make it easier to see how the full homepage might come together. You can spot everything from navigation elements and content blocks to feature callouts and newsletter signups, giving a clearer sense of layout and priorities without getting lost in design details or copy.
This level of wireframe is a great checkpoint: refined enough to share with stakeholders or collaborators, but still flexible enough to evolve.
Nerd Note: If your project doesn’t need it, then don’t sweat it! In fact, most designers go straight from Low-Fidelity to High-Fidelity or a prototype website.
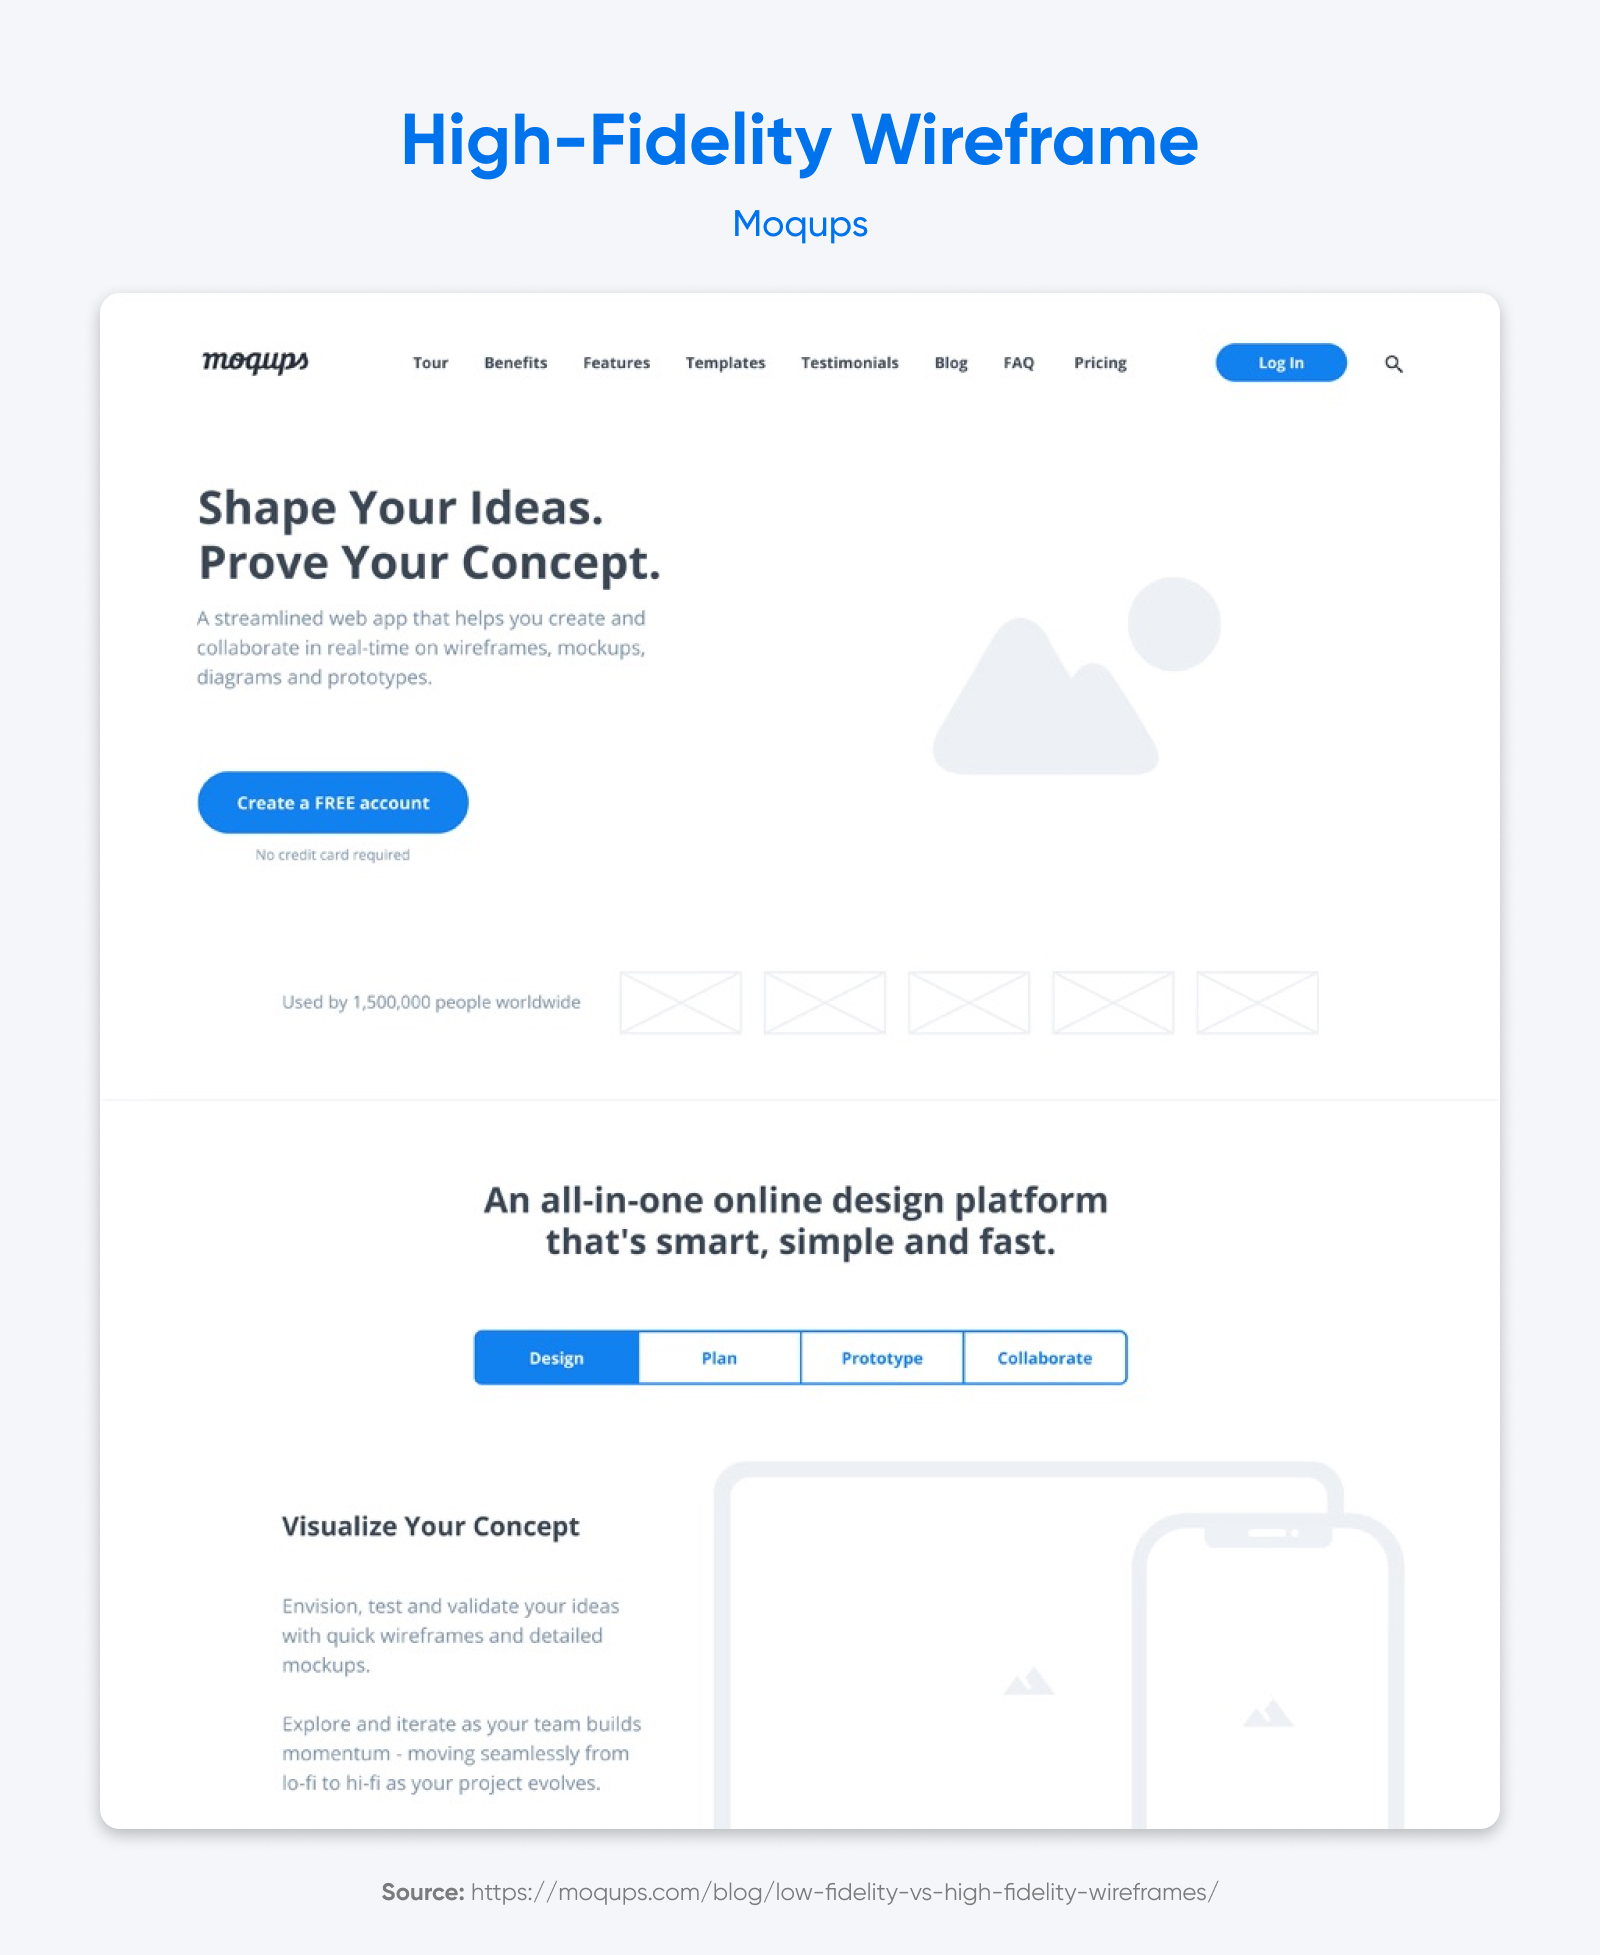
High-Fidelity Wireframe / Mockup
While still clean and totally achievable, this example from Moqups goes beyond a standard high-fidelity wireframe. It includes not just structure and layout, but also brand elements like color, typography, and light imagery. At this level, the line between wireframe and mockup starts to blur.
Traditionally, wireframes stick to greyscale placeholders to keep the focus on usability and flow. In more advanced versions, though, adding a bit of visual styling — like a single brand color or sample button treatment — can help communicate visual hierarchy or clarify design intent. Just make sure those design details don’t pull attention away from the core goal: mapping out a usable layout.
If you’re working with a designer and already have a clear vision in mind, this kind of hybrid wireframe can be a smart way to get aligned before moving into full visual design.
Nerd Note: Let’s talk mockup vs. prototype real quick. A mockup is similar to a wireframe because it’s static. It’s a visual representation of your website. A prototype is an interactive display with functional links, ready for user testing and evaluation.
Next Step: From Wireframe to Website
OK. So you’ve got a concrete idea of how your website is going to function and even what it may look like.
Now, how do you make the leap to getting the real thing up and running?
The way we see it, there are basically two options, which we’ve talked about above —you can either do it yourself or hire it out.
The DIY option isn’t nearly as scary as it sounds. Today, there are dozens (if not more!) of website builders on the market. Most of them use templates and drag-and-drop capabilities to help you build a functional, beautiful website in a matter of hours.
However, you have to choose carefully if you want an option that actually helps you get that website live online where your audience can find you!
In other words, you want a platform that makes it easy to find, purchase, and maintain the technical elements like your domain and hosting solution. DreamHost’s Liftoff Website Builder makes it shockingly simple to create the great site you’ve envisioned in your head. Also, it comes with a free domain, hosting, and the huge benefit of working with a team that has decades of experience in the website world.
Our pro services department can take your wireframe and design, build, launch, manage, and heck — even market your website for you.
Pro Services – Design
Beautiful Websites, Designed From Scratch
Stand out from the crowd with a modern WordPress website that’s 100% unique to you.
See More
Did you enjoy this article?
