Improving Database Performance on VPS


Search “improve VPS database performance” and you’ll find hosting companies pitching VPS upgrades through blog posts. We could too — we have a highly scalable VPS product.
But upgrades alone won’t solve your problem.
You’d just have a slow database on a more expensive server. The reality is, most websites don’t need upgrades, especially not as the first step to improving performance.
You want to optimize the website and database before considering an upgrade.
That’s our aim with this guide — to help you optimize database performance on your existing VPS.
What Do We Mean By “Optimizing Database Performance”?
Optimizing database performance means systematically improving how quickly and efficiently a database processes queries, handles concurrent users, and manages resources. This involves techniques like indexing, query optimization, and hardware tuning to reduce response times, increase throughput, and lower operational costs while maintaining data accuracy and system reliability.
Here’s how that plays out:
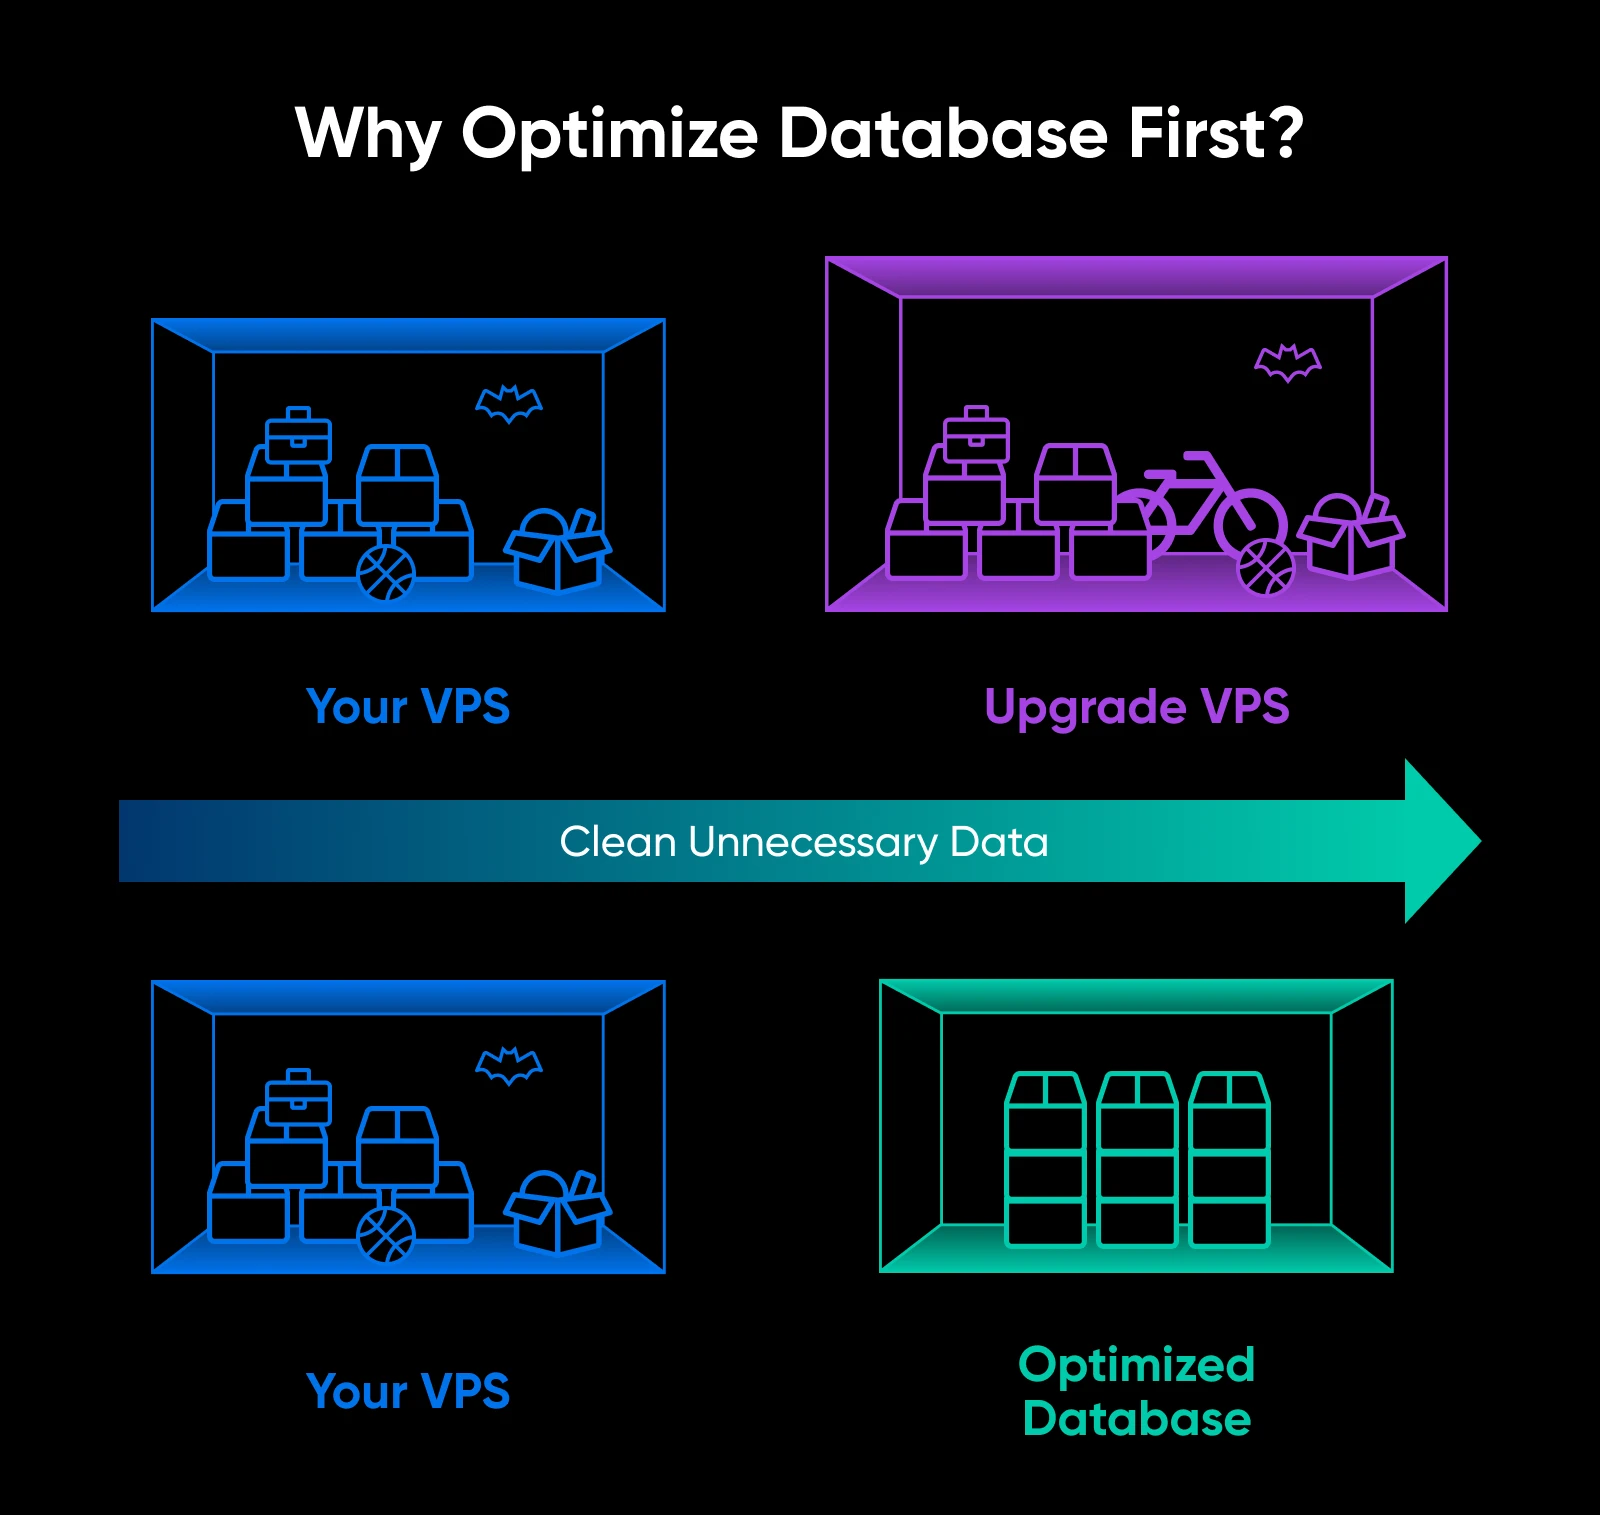
Think of your database as a storage room. Over time, things pile up until there’s no space to move around and finding what you need takes forever.
To help with that, you could:
- Buy a bigger storage space.
- Remove unnecessary items.
The better option: remove unnecessary items first. Moving clutter to a bigger space doesn’t solve the root problem. You could end up with the same problem a couple months down the line, now with your bigger storage space.
Your database works the same way. It collects data (even hoarding stuff you no longer need) so, you need regular cleanups.
Is It Really Your Database or Website Code That’s Bloated?
You need to check what’s actually slowing down your site.
When database is the bottleneck:
- Pages with dynamic content (like product listings or blog archives) load slowly.
- Your site admin area feels sluggish when managing posts or products.
- Database queries take longer than 1-2 seconds to complete.
- Peak traffic times cause significant slowdowns.
When website code is the problem:
- Your site takes forever to load even if database activity is minimal. (Even static pages load slowly!)
- Large image files or unoptimized media bog down loading times (check GTmetrix first).
- Too many plugins or heavy themes cause delays.
Quick diagnostic tools:
- Use tools like Query Monitor (for WordPress) to see which database queries are taking the longest.
- Check your server’s CPU and memory usage during peak times.
- Run a PageSpeed test on both database-heavy pages and static pages to compare load times.
If database queries consistently exceed a few seconds, or database-heavy pages load significantly slower than static ones, you have a database performance issue worth addressing.
Nerd Note: We should be clear – These recommendations are not DreamHost-specific. We mention this because when you have one of DreamHost’s managed hosting environments, the DreamHost crew will take care of the server-level maintenance for you.
How Can You Optimize Database Performance on a VPS?
Here’s your step-by-step roadmap to make your database run like it’s on performance-enhancing supplements:
1. Update Your VPS Software
It sounds basic, but many website owners never update their VPS operating system or server software after the website is live.
Why it matters: Outdated database software is the easiest way to miss out on performance improvements and security patches that developers have published.
For instance, a database performance test showed that newer versions of MariaDB are 13%-36% faster than MySQL versions from the same time. So, if you’re still using an older database version, updating to the latest version should result in a significant performance boost.
What to update specifically:
- Database software: MySQL or MariaDB
- PHP version: PHP 8.4 (latest stable version released November 2024) or PHP 8.3 for maximum compatibility
- Operating system: Keep your Linux distribution updated with the latest security patches
- Web server: Apache or NGINX
Nerd note: Remember to test updates in a staging environment first! You don’t want your live site to break because of a compatibility issue.
2. Clean Up Database Bloat
Remember that storage room analogy? It’s time to Marie Kondo your database now.
Here’s some common database clutter you’ll regularly need to clean up:
- Old post revisions (WordPress can save 50+ revisions per post)
- Spam comments and unused comment meta
- Expired transients and cache data
- Unused plugins’ leftover tables
- Log files that haven’t been cleared in months
For WordPress users:
- Use plugins, like WP-Optimize or Advanced Database Cleaner.
- Limit post revisions by adding define (‘WP_POST_REVISIONS’, 3); to your wp-config.php.
- Clear out spam comments regularly.
- Upgrade your PHP version to PHP 8.4, which includes performance improvements, including 2x-5x faster SHA-256 operations and optimized sprint functions.
For other platforms:
- Run OPTIMIZE TABLE commands on frequently updated tables.
- Delete unnecessary log entries older than 30 days.
- Remove test or dummy data you created during development.
3. Database Indexing
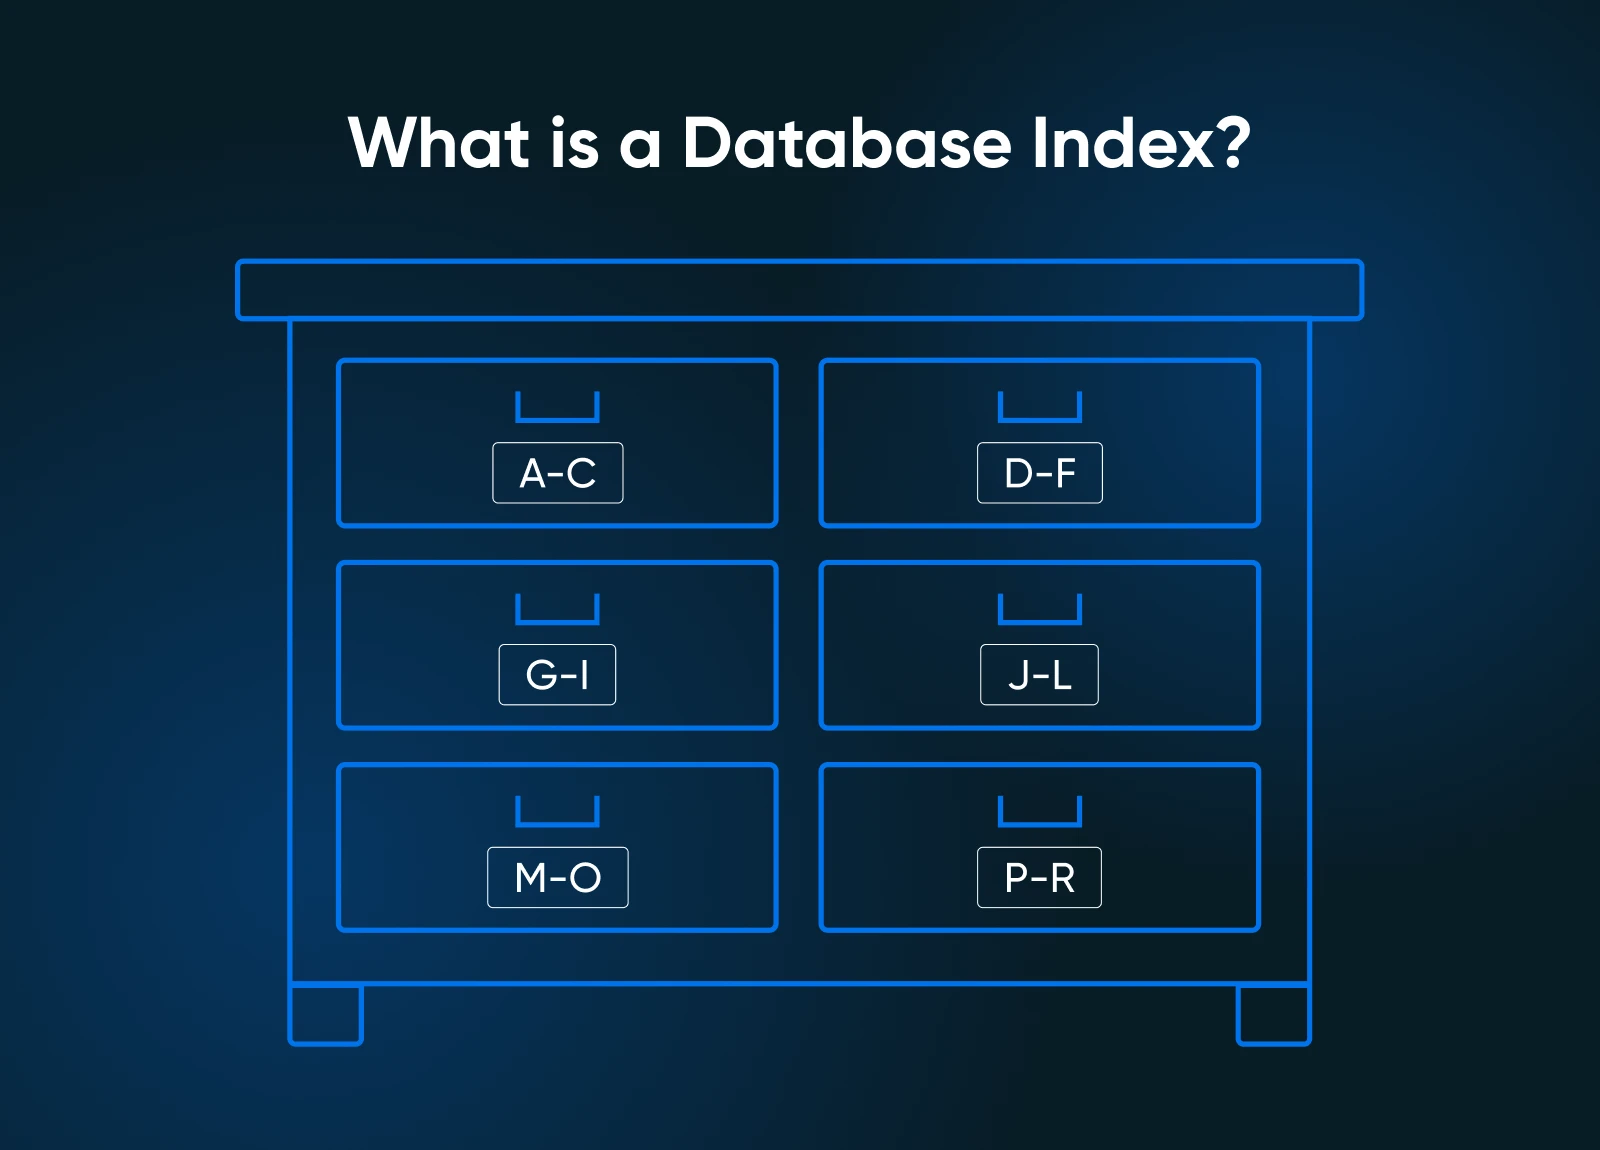
Think of database indexes as a table of contents for a book.
Without them, your database must scan every single row to find what it needs. With indexes, the database can shortcut its way to where the data you asked for is. Proper indexing can reduce query times from seconds to milliseconds and help improve your database performance by a lot, especially with larger databases.
For WordPress, use a plugin like Index WP MySQL For Speed, run through the steps in the plugin, and that’s it.
However, you absolutely need to create a website backup before indexing the database.
When to add indexes:
- You have large tables with thousands of rows for products, blog posts, users, etc
- Columns you frequently search or filter by
- Foreign key columns
- Many columns used in “JOIN” operations or “WHERE” clauses
When NOT to add indexes:
- Small tables (under 1,000 rows usually don’t see any performance gains)
- Columns that change frequently (indexes slow down “INSERT/UPDATE” operations)
- You’re short on space and want to be resourceful (indexes take up space)
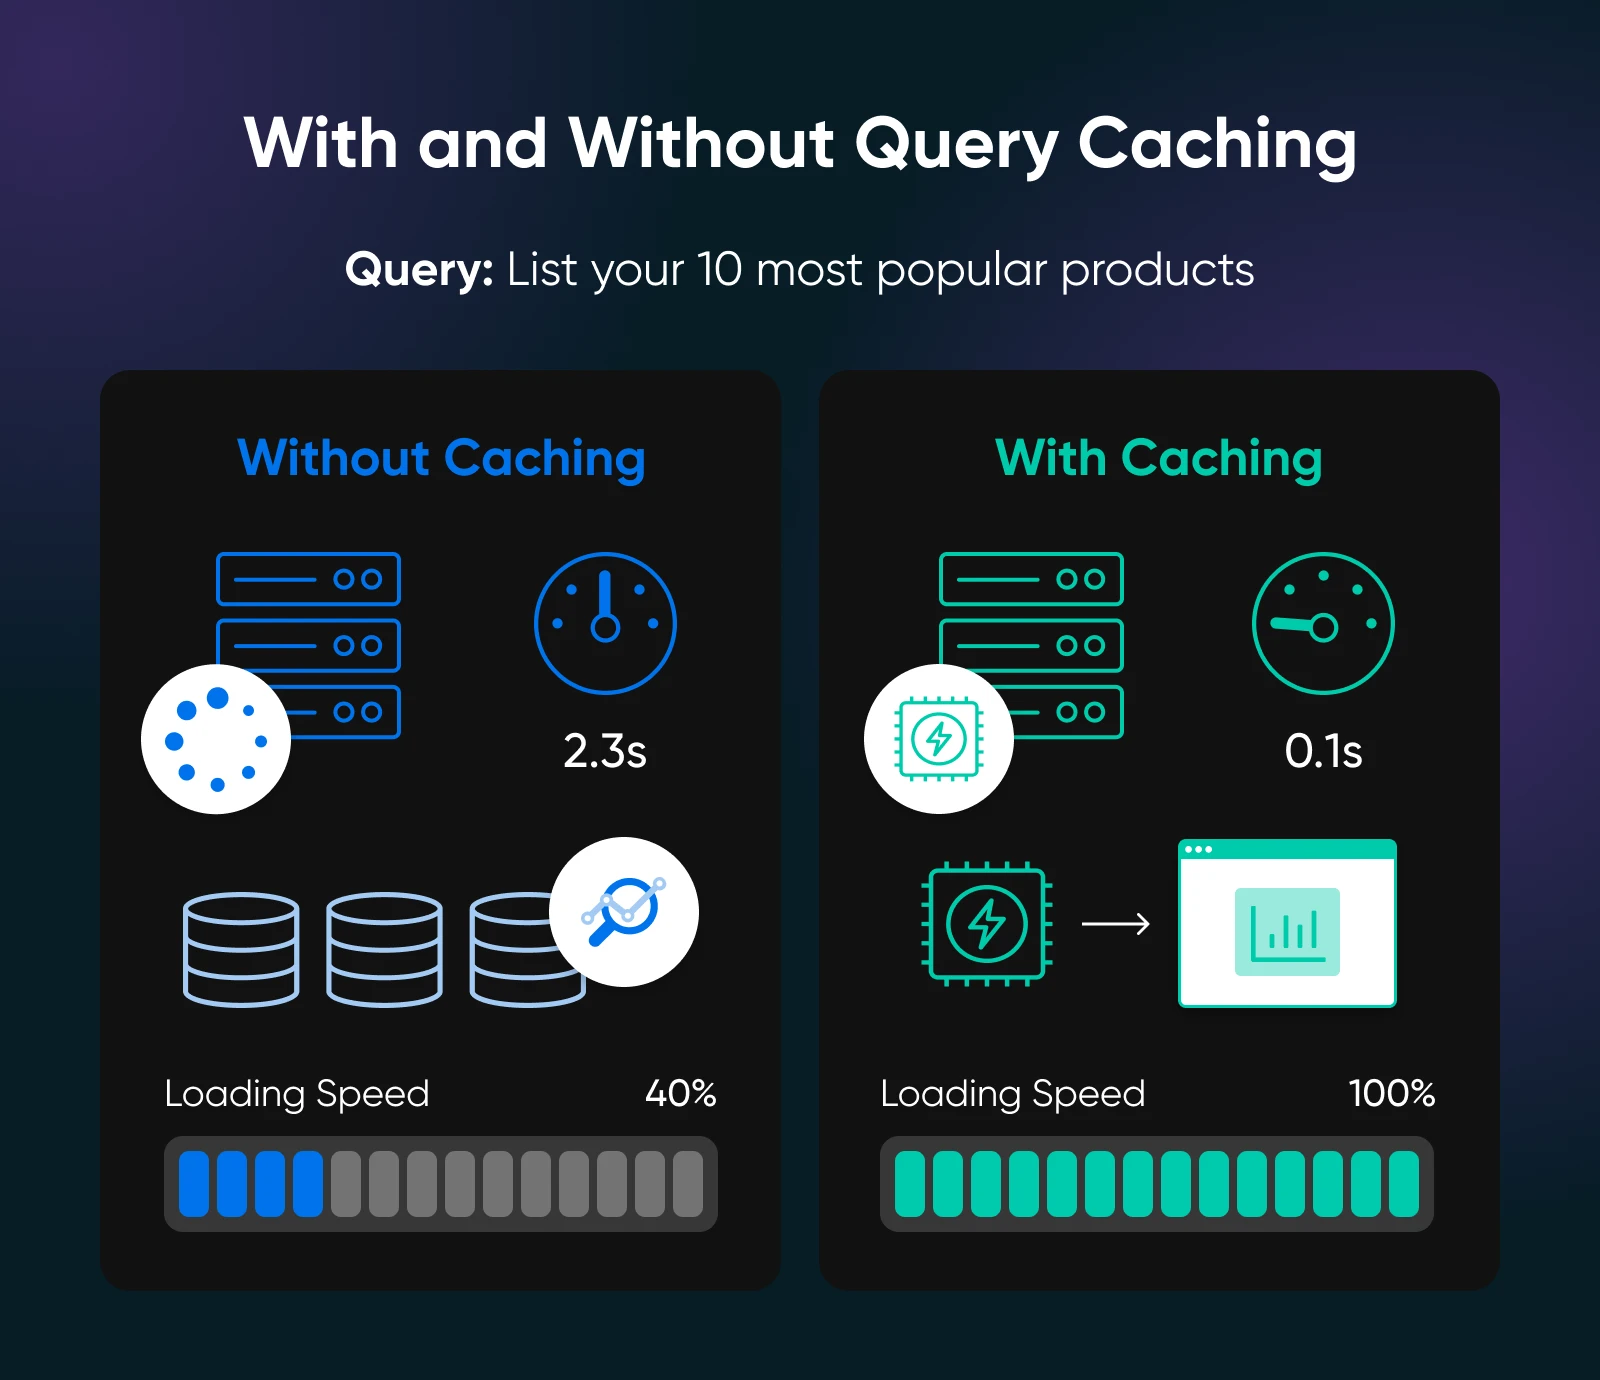
4. Set Up Query Caching
Your database is like a helpful librarian who gets asked for the same set of (popular) books often. Instead of walking to the back room, trying to find the books over and over again, a smart librarian remembers where the books are, maybe even keeping the books in her desk drawers.
Query caching is similar to this. When your database runs a query, it stores the result in memory. The next time someone requests the same data, instead of running the complex query again, your database serves up the cached result almost instantly.
If the data gets updated, the cached result gets updated, and new users are served the latest results automatically.
Here’s how you can implement query caching for MySQL 8.0 users (most common):
- ProxySQL: The recommended replacement for MySQL’s query cache. It sits between your application and database, caching results with configurable TTL
- Application-level caching: WordPress users should use caching plugins like W3 Total Cache or the likes instead of database-level caching for quicker implementation.
- Redis or Memcached: External caching systems that require code changes but offer more control and better scalability. Some hosting products offer built-in object caching with Redis for e-commerce sites, membership sites, and news or blog sites.
For most small websites, you can safely skip database-level query caching entirely. Instead, use your CMS or application’s built-in caching features first. If you need more performance, reach out to a dev for implementing a Redis instance for object caching.
Important update: MySQL’s built-in query cache was deprecated in MySQL 5.7.20 and completely removed in MySQL 8.0. While MariaDB still supports query cache, it’s disabled by default due to scalability issues on multi-core machines.
5. Tune Your Database Configuration
Your database comes with default settings designed to work on any server, from a tiny shared host to enterprise hardware. But just like a one-size-fits-all t-shirt, these settings are not optimized for your needs. They just get the work done.
VPS environments give you the power to customize these settings for your specific setup.
Here are the most impactful changes for MySQL and MariaDB databases:
- innodb_buffer_pool_size: Set to 70-80% of your available RAM. For a 4GB VPS, use around 3GB.
- innodb_redo_log_capacity: For MySQL 8.0.30+, start with 1-2GB (replaces the old innodb_log_file_size setting).
- max_connections: Set to 4x your CPU cores, minimum 100. Most small sites need only 20-50.
- query_cache_size: 128M-256M for MySQL 5.7/MariaDB (MySQL 8.0 removed query cache entirely).
Use MySQL Tuner or PGTune to get personalized recommendations based on your actual usage patterns. These tools analyze your current setup and suggest optimal values.
Pro tip: MySQL 8.0.30+ lets you resize redo logs without restarting:
SET GLOBAL innodb_redo_log_capacity = 2147483648
Always back up your database before making configuration changes! Test on a staging environment, and then during low-traffic periods.
6. Choose the Right Storage Engine
Think of storage engines as different filing systems for your data. You need to organize data differently to work with the storage engine you use.
Most modern applications use InnoDB (MySQL’s default), but there are specific cases where other engines make sense on a VPS.
- InnoDB (recommended for most sites): Perfect for e-commerce sites, blogs, and applications with frequent updates. It supports transactions, foreign keys, and crash recovery. The trade-off is slightly higher memory usage, but on a VPS with dedicated resources, this isn’t usually a problem.
- MyISAM (use sparingly): Faster for read-heavy operations and uses less memory, but lacks crash recovery and transaction support. Only consider this for tables that rarely change, like lookup tables or archives.
- Memory (special cases only): Stores data in RAM for lightning-fast access but loses everything when the server restarts. It’s perfect for temporary data or session storage on a VPS where you control the environment.
To check what storage engines your tables are using, run:
SHOW TABLE STATUS;
In your MySQL console, you can convert tables with:
ALTER TABLE your_table ENGINE = InnoDB;
The VPS advantage: Unlike shared hosting, you have full control over storage engine choices and can also choose to run multiple engines simultaneously without restrictions. Of course, that means you have to be careful with what you pick right in the beginning to avoid migration later.
7. Monitor and Test Continuously
Database optimization isn’t a “set it and forget it” task. Your site grows, traffic patterns change, and what worked last month might not be optimal today.
The good news is that VPS environments make monitoring straightforward since you have full access to system resources and database logs.
Here are a few essential monitoring tools:
- htop or top: Monitor CPU and memory usage in real time.
- iostat command: Check disk I/O performance (install with: apt-get install sysstat).
- MySQL Process List: Run SHOW PROCESSLIST; to see active queries.
- Slow Query Log: Enable this to catch queries taking longer than 2 seconds.
You set up a weekly check using tools like GTmetrix or Google PageSpeed Insights, focusing especially on pages that hit your database heavily — product pages, search results, or blog archives.
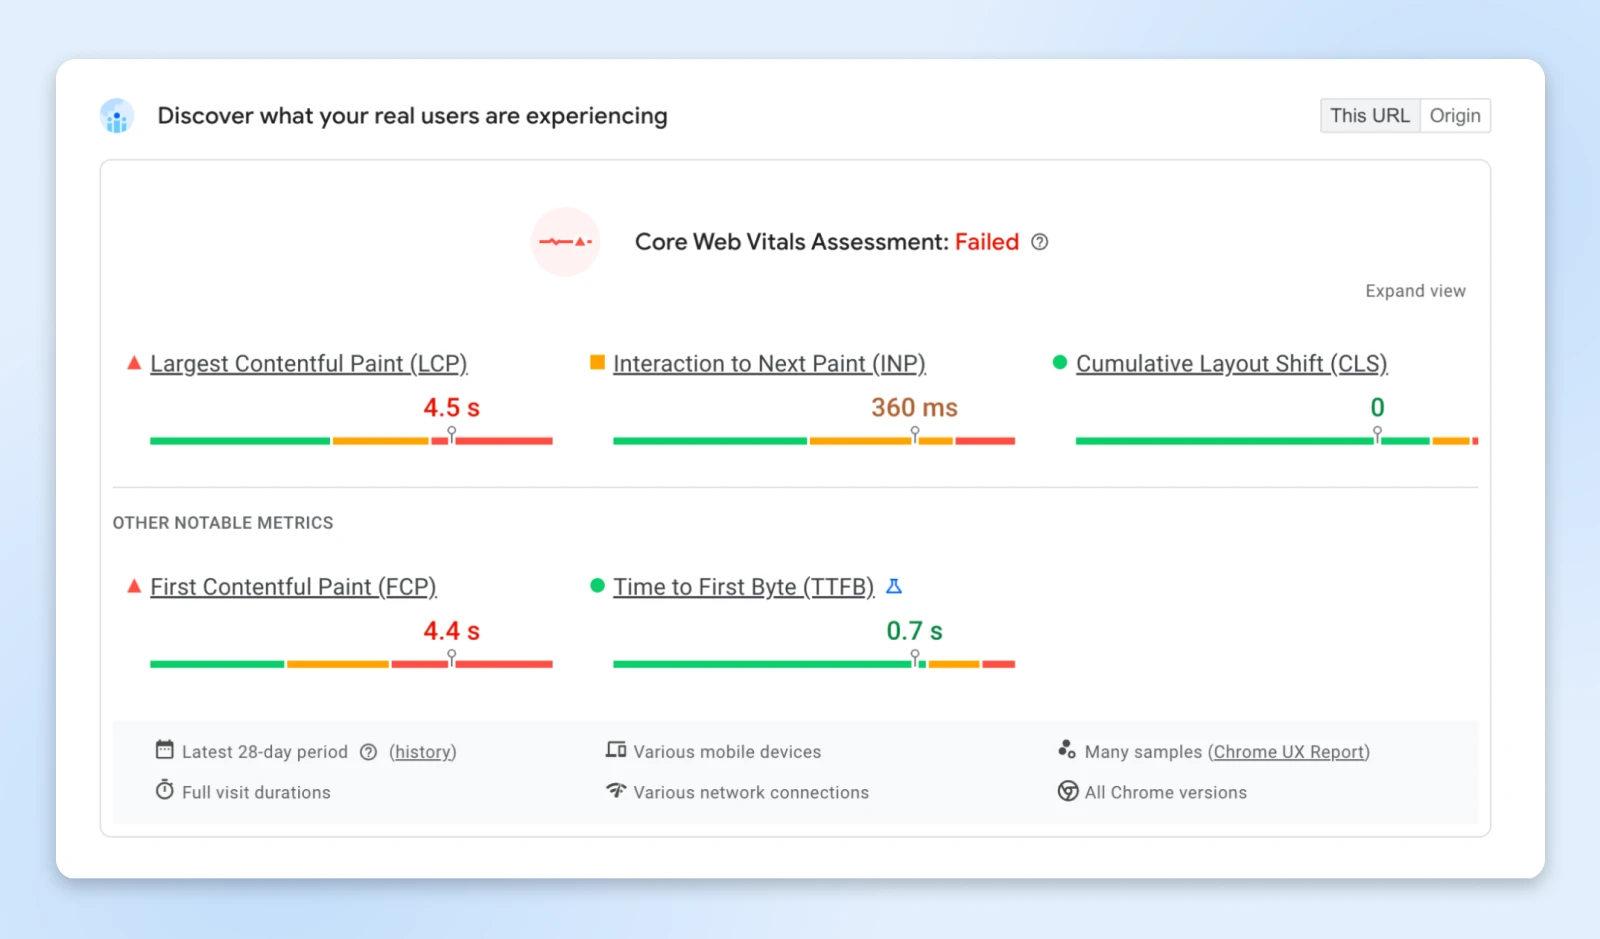
Focus especially on your Time to First Byte (TTFB), as this is often where database performance issues can be spotted. In the above screenshot, you see the TTFB is 0.7 seconds.
TTFB
TTFB is an abbreviation for Time To First Byte. This measures the length of time a browser waits before receiving the first data byte from a server.
Read More
Improving TTFB also improves your Core Web Vitals score, which is one of Google’s ranking signals.
Red flags to watch for:
- TTFB consistently over 1 second
- Memory usage above 80% during normal traffic
- Slow query log showing the same queries repeatedly
- Database connections maxing out during peak times
When you spot issues, don’t panic and don’t immediately assume you need a VPS upgrade. Usually, one of the optimizations we’ve covered just needs some fine-tuning.
When Should You Actually Upgrade Your VPS?
In our storage room analogy, you’d remember we optimized (removed trash) to fit the same room.
But, if you lack space even after optimization, you’ve outgrown the room and it’s time to buy a bigger one.
That’s the same with a VPS upgrade. If you’ve done all the optimizations and you still don’t see much change in performance, you may need a bigger VPS.
Here are a few clear signals that will tell you if the VPS is the bottleneck:
- CPU usage consistently above 80% during normal traffic.
- RAM usage regularly exceeds 85%.
- Database queries are optimized but still slow due to hardware limitations.
- Website load times still exceed 3 seconds after optimization.
What to upgrade first:
Remember, the recommended page loading time for all websites is under 3 seconds. Try to get it as low as possible and you’re good!
Your Database Performance Journey
Now, I’ve got good news and some not-so-good news.
The good news is, you have a fully optimized database running efficiently on your VPS and serving your website at lightning fast speeds.
The not-so-good news is, it’s not over. Just like any other maintenance task, databases need regular optimization.
But you’re no longer flying blind. You know what to look for and how to fix it.
There are many tools (like WP Optimize and LiteSpeed Cache’s database optimization) that help you run most of the database maintenance tasks with a few clicks if you’re using WordPress.
If an upgrade is the only option left, try DreamHost’s VPS plans and experience the almost instantaneous speed boost you’re website will see with our highest quality hardware.

VPS Hosting
Take Charge with Flexible VPS Hosting
Here’s how DreamHost’s VPS offering stands apart: 24/7 customer support, an intuitive panel, scalable RAM, unlimited bandwidth, unlimited hosting domains, and SSD storage.
Choose Your VPS Plan
Did you enjoy this article?

