How to Apply CSS for Specific User Roles in WordPress (Easy Way)
Changing your site’s appearance for different user roles can help you create personalized user experiences.
We’ve found that many users prefer websites with personalized interfaces. For instance, you might want to display specific elements to authors that are hidden from other users or style certain sections differently for subscribers or customers.
In this tutorial, we will guide you through applying CSS for specific user roles in WordPress. This will help you customize different areas based on the specific needs of your users.
Why and When to Apply CSS for Specific User Roles in WordPress
We manage various websites for our businesses that require user login. We often find the need to customize the appearance for different user roles.
While running split tests on those sites, we’ve discovered that personalization greatly enhances the user experience. A better user experience ultimately leads to more customer satisfaction, conversions, and sales.
Whether you’re a site owner, developer, or designer, having control over how your site looks for different users can be very useful.
Here are some common use cases:
- Membership Sites: You can use custom CSS to offer different experiences to premium members.
- eCommerce Stores: You can highlight shopping carts, return customer discounts, and other features for logged-in customers.
- Multi-Author Blogs: Managing a blog with multiple authors can get messy. With custom CSS, you can create a clean, efficient interface for editors while keeping things simple for contributors and subscribers.
- Client Sites: You can create a simplified admin area for clients by hiding certain elements with custom CSS.
Now, the problem is how to tell WordPress which CSS code to load for different user roles.
Applying Custom CSS for Specific User Roles in WordPress
The easiest way to manage custom code, including CSS, in WordPress is by using WPCode. It is the best code snippets plugin for WordPress and lets you safely manage your custom CSS in one place.
Note: A free version of WPCode is also available. However, we recommend upgrading to a paid plan to unlock more features.
Why we recommend WPCode:
- It lets you safely add any custom code, including CSS, without breaking your website. If a code snippet isn’t working, you can easily disable it.
- It comes with powerful code insertion and conditional logic tools, allowing you to only run a snippet when needed.
- You get access to a massive code library of useful snippets, saving you from installing several separate plugins.
That being said, let’s add some custom CSS and apply it for specific user roles.
Adding Custom CSS in WPCode
First, you need to install and activate the WPCode plugin. For more details, see our tutorial on how to install a WordPress plugin.
Upon activation, go to the Code Snippets » +Add Snippet page. There, you will see many useful snippets for various tasks.


However, since you are adding a custom CSS code, you will need to start from scratch by clicking ‘+ Add Custom Snippet’ under the ‘Add Your Custom Code (New Snippet)’ box.
This will bring you to the code editor. First, you need to enter a title for your code snippet and then select ‘CSS Snippet’ under Code Type.
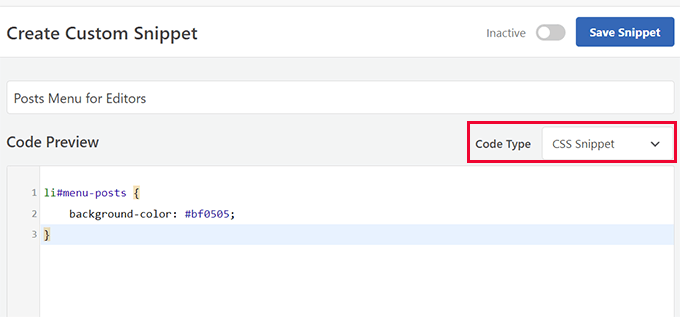

Now, you can add your custom CSS code to the Code Preview box.
For the sake of this tutorial, we are using this code, which highlights the ‘Posts’ menu in the admin area by changing its background color. You can use your own CSS code here:
background-color: #bf0505;
}
Choose User Role Conditional Logic
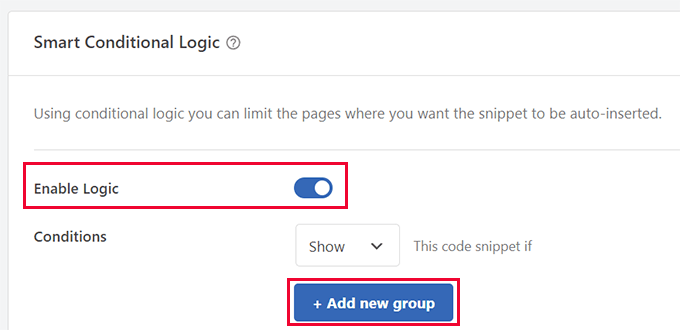
Next, scroll down to the ‘Smart Conditional Logic’ box and switch the toggle next to the ‘Enable Logic’ option.
After that, choose the ‘Condition’ (Show or Hide) and then click ‘Add new group’.

Click on the first box in the Rule to expand it. You will see a list of rules to choose from.
For instance, you can select login status, user role, device type, etc.
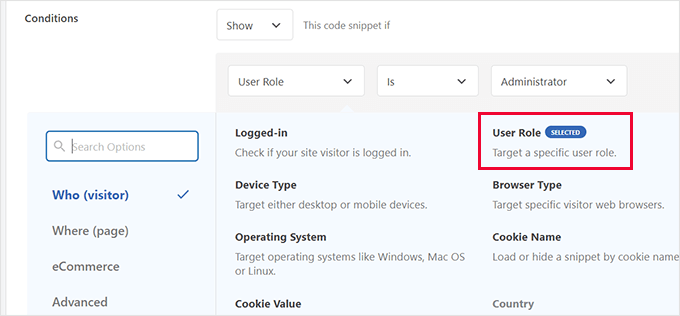

Select ‘User Role’ since you want this custom CSS code to be added for a particular user role.
After that, you can select which user role you want to apply it to.
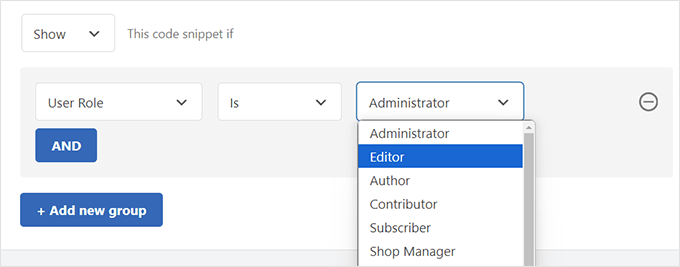

Note: You can add multiple conditional logic rules by clicking the ‘+ Add new group’ button.
Once you are done, click ‘Save Snippet’ at the top right corner of the screen and then switch it to ‘Active.’
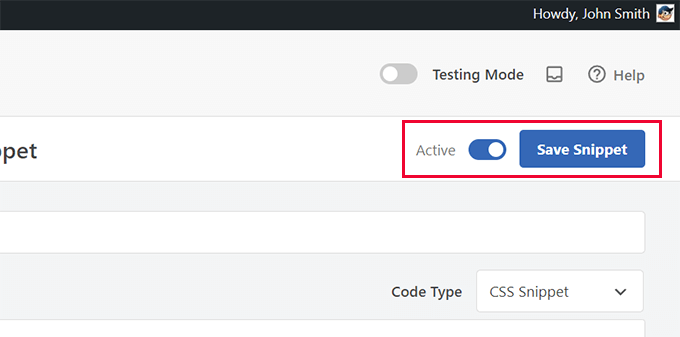

WPCode will now show your custom CSS to specific user roles in WordPress.
Add Custom CSS for Specific User Roles in the WordPress Admin Area
If you only want your custom CSS to be added inside the WordPress admin area, then WPCode makes it even easier.
On the code edit screen, scroll down to the ‘Location’ option. Click the dropdown menu to expand it, and you will see a bunch of locations where you can automatically load the CSS.
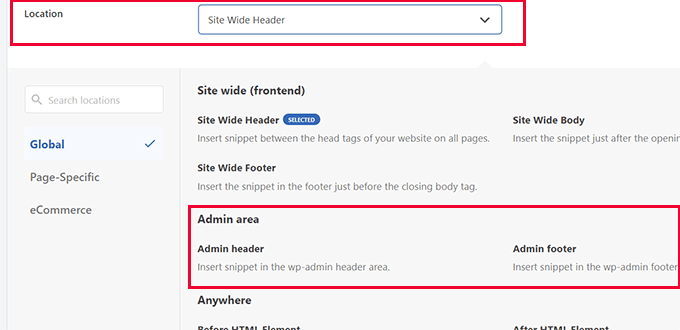

Now, simply select the ‘Admin header’ or ‘Admin footer’ option to load your CSS code in the WordPress admin area.
Add Custom CSS for Specific User Roles in Other Areas
Design personalization on eCommerce websites leads to an improved user experience and has been proven to decrease abandoned cart sales.
If you run a WooCommerce store, sell online courses, or sell other digital products, then adding custom CSS for logged-in customers will be useful.
WPCode lets you choose where to add custom code to an eCommerce site. Under the Location settings, switch to the ‘eCommerce’ tab.
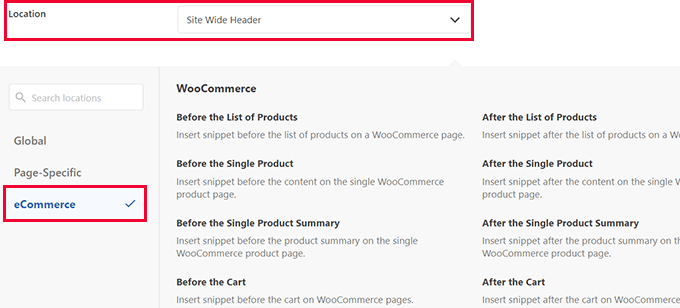

You will see several places where you can add your custom CSS, such as before the cart, before the checkout form, on product pages, and more.
WPCode supports WooCommerce, Easy Digital Downloads, and MemberPress.
Bonus Tips
The following are some additional resources to help you design custom user experiences in WordPress. You don’t even need to learn CSS for some of these options:
We hope this article helped you learn how to apply CSS for specific user roles in WordPress. You may also want to see our default WordPress generated CSS cheat sheet for beginners or check out these plugins and tips to improve the WordPress admin area.
If you liked this article, then please subscribe to our YouTube Channel for WordPress video tutorials. You can also find us on Twitter and Facebook.


